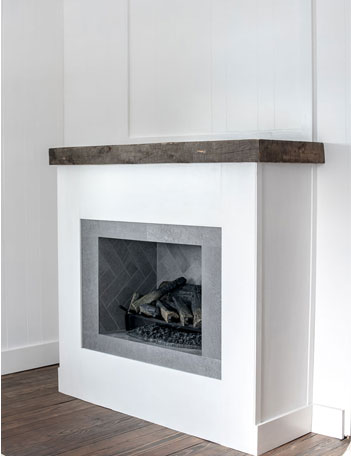
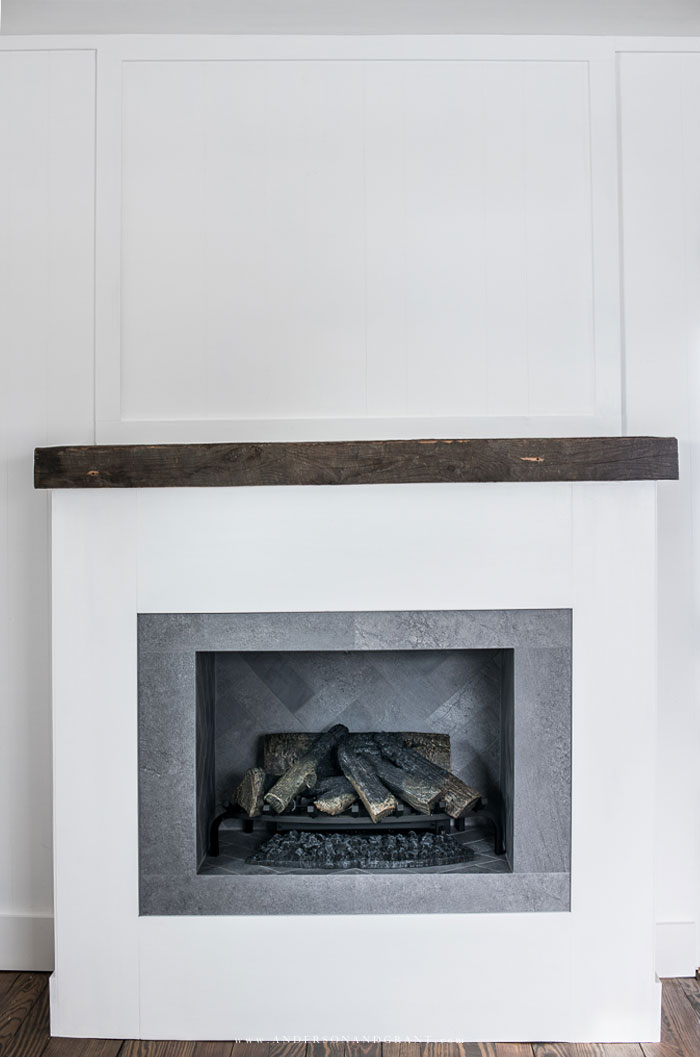
The step-by-step process I took to creating a fake modern farmhouse fireplace for my living room, including how I made a rustic wood mantel and added herringbone tile to the firebox.
CREATE | Published January 27, 2020
This post may contain affiliate links which means I receive a small commission if you choose to make a purchase using the link, but there is no additional cost to you. For more information, you can view my disclosure policy.
I have never built a single thing in my life. Sure, there has been furniture that comes in a box with the screws you need, labeled boards and an instruction manual that I've put together. But I've never started from scratch to design something, build the framing, and end up with a finished project.
I can't say that anymore, though, because I have built a fireplace.
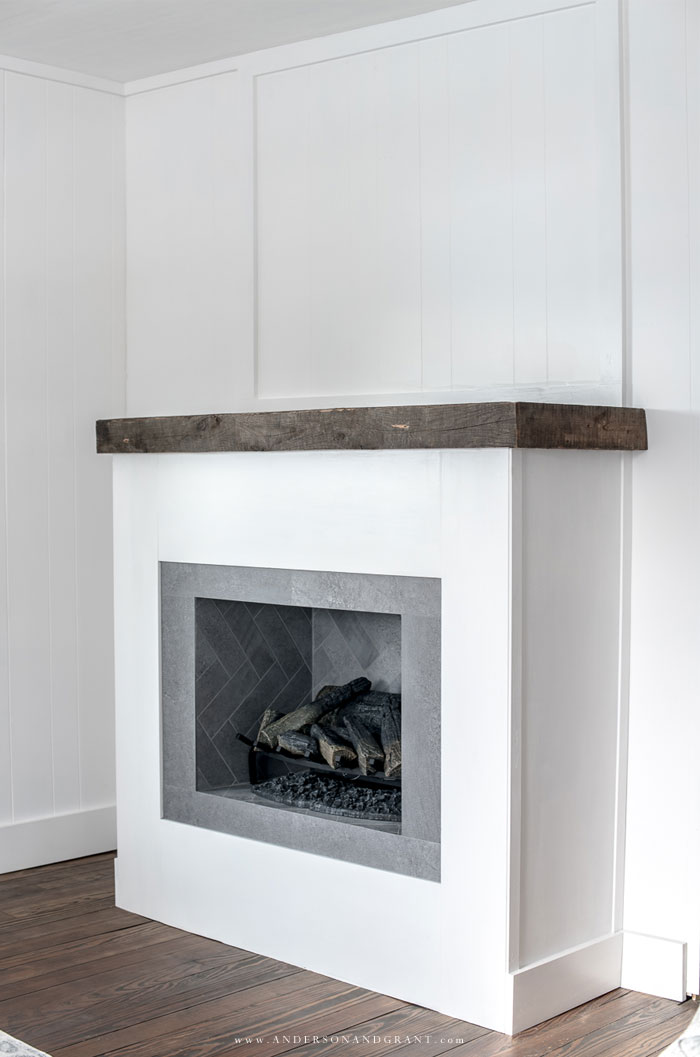
When designing my living room, I've always wanted a faux fireplace somewhere in it.
And I could have went out and bought a premade version in just about any style. Problem was that I wanted this fireplace to look like it's been here as long as the 100+ year old floors and plaster walls and just improved like the rest of the room has been.
And the only wall that could realistically work for the fireplace to be built on had a heating vent sticking out right in the middle preventing anything from being able to be pushed up against the wall. (This vent has been closed off for years and there is another one in the room, so I'm okay with putting something in front of it, but I didn't want to remove it entirely.)
FOLLOW ALONG ON THE FULL TRANSFORMATION OF THIS LIVING ROOM
DEMO IN THE LIVING ROOM
WORKING IN THE STAIRCASE AND ON THE CEILING
REFINISHING THE HARDWOOD FLOORS (scroll to the bottom of the post)
THE LIVING ROOM PRIOR TO ADDING FURNITURE AND DECOR

The design was clear in my head what I wanted this fireplace to look like and I knew the only way to get that design was to figure out how to build it myself.
See where I found my inspiration for my own fireplace design:
After sketching out the design, I then sketched out what the structure must have to look like behind it. (Those drawings are now covered with measurements and calculations, but this was a little mock-up of the basic design that I shared on Instagram).

Then I took a trip to Lowes armed with a shopping list, filled the cart with my lumber, ignored the numerous looks that said "that poor girl probably has no idea what she's doing," loaded said lumber carefully into my Ford Escape knowing that an 8 foot board would just fit front to back as long as I pushed it between the two front seats, and drove home.
Yes, there were many times I cut a board too long.
Yes, I realized that my 100+ year old living room floor is not level so I had to make the right side taller than the left, but even it all out on the outside so that you'd never realize what was happening inside.
Yes, I didn't quite have all the right tools so my design had to then include some unplanned decorative trim to make everything look finished in the end.
But I built a fireplace that is sturdy and stands level. And looks just like I planned.
I'm going to share what I did, but please know that these are not building plans. I learned as I went. I made things work. And it was made in a custom fashion to work around the heating vent and electrical outlet needed to plug in my logs.
HOW I BUILT MY DIY FIREPLACE SURROUND
The faux logs that I purchased needed a firebox to be built to a certain size, so I started there, measuring out the minimum length and height and taking into account the addition of the tile that would be added on top.
I made the box out of 1/4 inch plywood and screwed everything together with 2x3's cut considering my final fireplace height of 54 inches. Then I added in horizontal 2x3 supports around the firebox to make it sturdy and give me something to attach my outer boards to.

From there, I extended the fireplace out equally on both sides with more 2x3 framing. I used my level a lot to ensure that what I was building was both level side to side and front to back as well as plumb straight up and down.
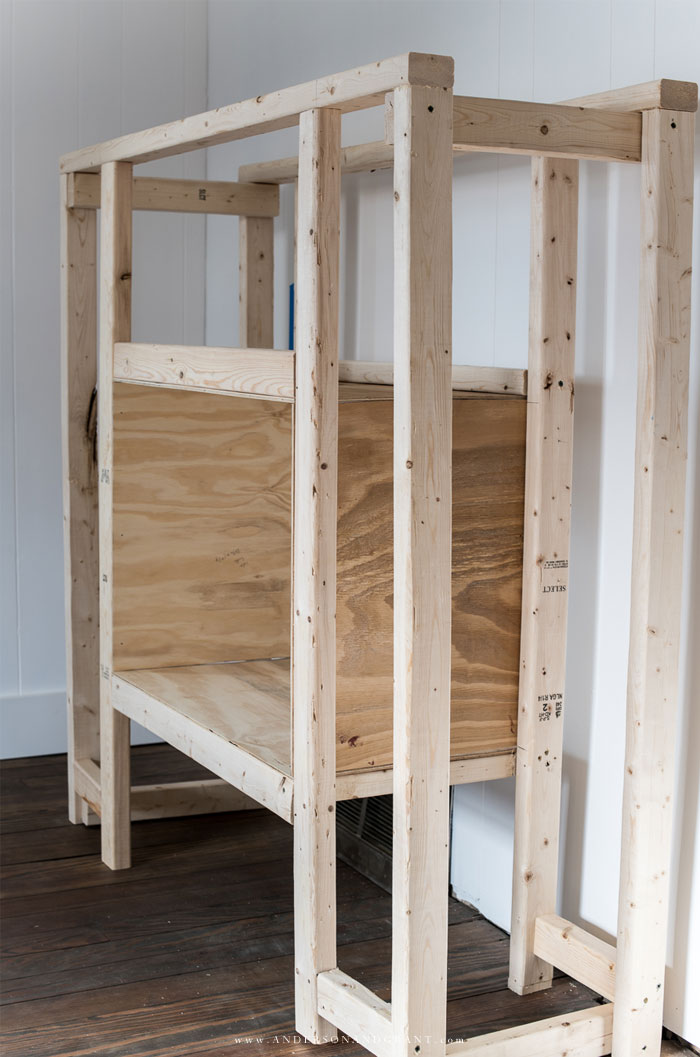
Once the framing was built, it was time to cover it up.
I used luan plywood sheets for the sides and pine boards for the front and nailed it all on using my finish nailer. The pine boards extended past the framing just enough to meet up with the plywood to create a seamless surface down the side.
The plywood was also used to cover where the tile would be added so that it was set back from the finished edge of the fireplace.
I added 1/4 inch trim vertically down both sides to cover the seams and create a tight fit to the wall. Then placed the same pine board baseboard I used in the rest of the room at the bottom.

All of the seams where the boards meet were caulked and the nail holes were spackled. When that was dry, the entire fireplace was sanded smooth. Then painted with three coats of Valspar Snowcap White in semi-gloss, the same paint I had used on all the trim in the room.
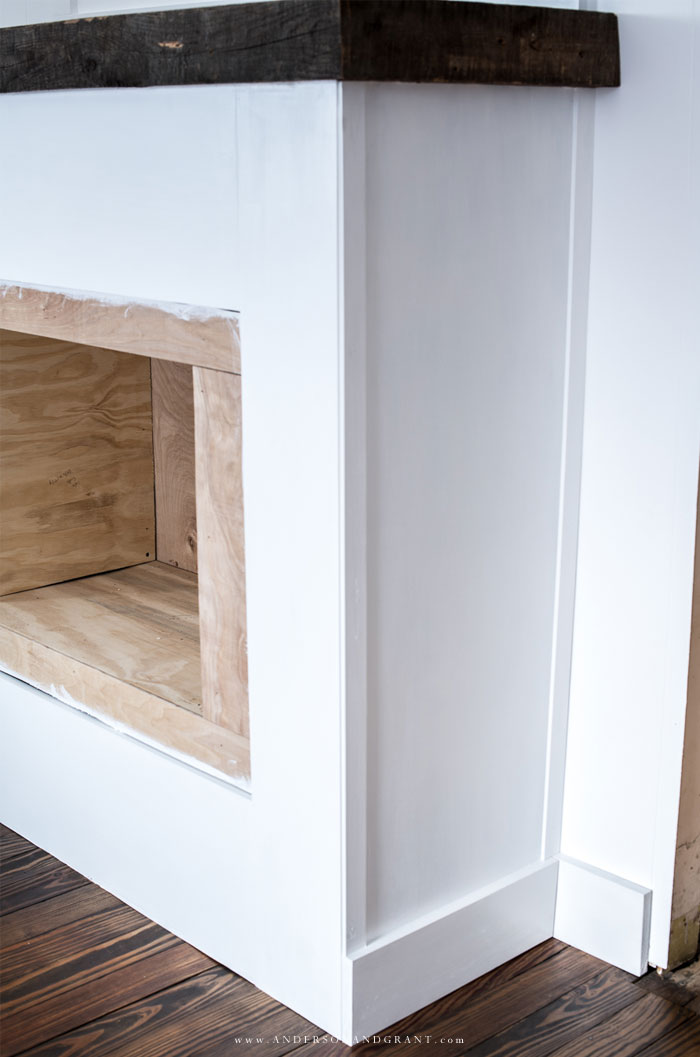
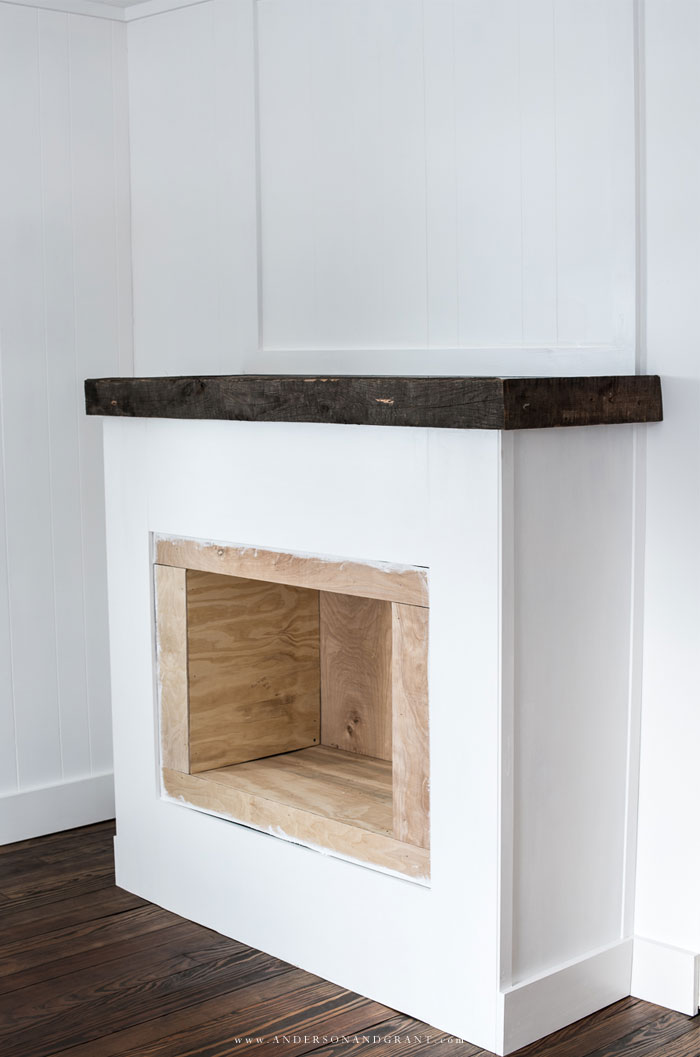
My original plan was to use the rustic old 2x4 boards that had been holding up the cardboard ceiling in the stairwell for the entire mantel, but there wasn't enough wood for a fireplace this deep. So I cut one of them to create a mantel wrapping around the fireplace. (Wondering about the cardboard ceiling reference? You'll find the story in this post in the staircase section.)
Then I stained boards from Lowes to sit level inside the mantel. I rubbed on two coats of Fusion Mineral Stain and Finishing Oil in Cappuccino with a rag and allowed each coat to soak down into the wood for about 10 minutes before wiping it away.

What I love is that looking at the mantel, you still just see the old rustic wood complete with cuts and nail holes, but that what I'm resting my decor on is flat and level. (Which I realized wasn't going to happen using the old wood.) And the rough Lowes boards actually stained to be very close in color to the old stained board.
The paneled wall behind the fireplace seemed too expansive, so I used 1x4 pine lumber to frame out the area from the fireplace to the ceiling breaking up the large span of white wall. This little bit of trim makes so much difference. Building out the fireplace floor to ceiling would have been too much for this little room. But adding the trim still makes your eye see the space above the mantel as belonging to the fireplace over just being part of the wall.


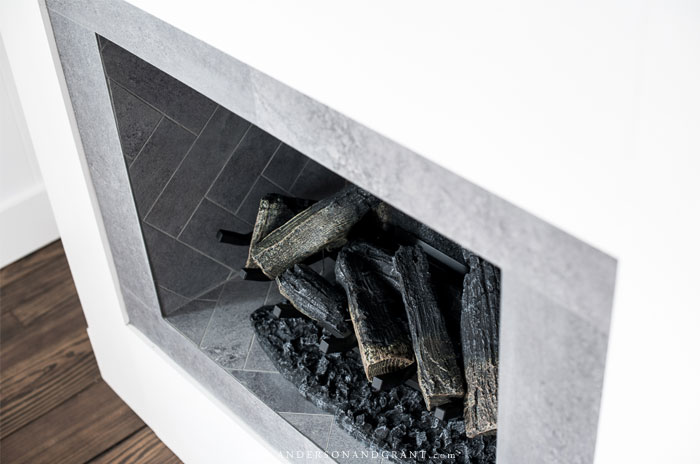
The final step for building my fireplace was tiling the firebox. Because these logs do not emit heat, I chose to use groutable luxury vinyl (from Lowes) so that I could cut it easily. This tile looks and feels very much like stone tile and you can add grout lines or place the tiles right beside one another for two different options. (And this is one of those times where the image online does not look anything like the tile itself.)
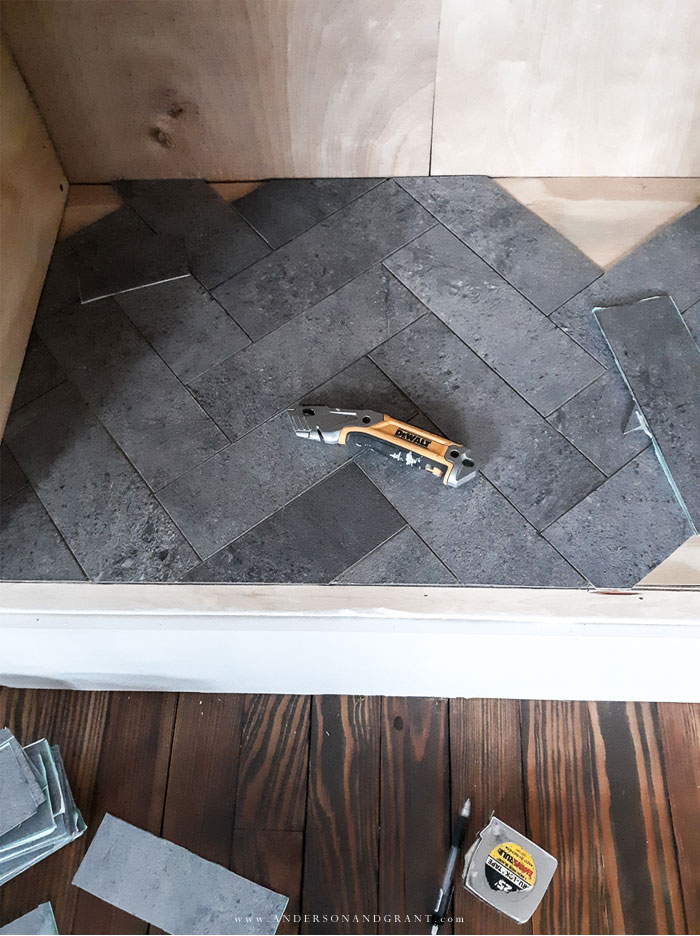
While I could have opted for an easy running subway tile pattern, I had my heart set on a more complicated herringbone pattern....Which of course added many days onto my timeline as each piece around the edges had to be cut at the proper length and angle to meet up with the corner!
The tile comes in a 12"x24" rectangle so I used a straight edge to cut pieces measuring 3"x9" with a sharp utility knife. (So you'd get 10 small rectangles and a smaller scrap for each large sheet of vinyl tile.) You don't have to cut the whole way through the tile as it can be scored a few times with the knife and then snapped apart.

The tiles are sticky and normally can just be pressed to the surface, but since I was also using them vertically and on the top of the fireplace box, I used Gorilla Glue clear adhesive on the backs of all the tiles so that they would stay in place. I left about 1/4 inch in between the tiles for grout.
On the front of the fireplace, I used the same tile. This time I adhered them without room for grout lines so that it would appear as a more solid surface.
I used 12 tiles in total for the inside and outside of the box. But there was some that I had to discard due to (ahem...many) mis-cuts.

Once everything was dry I used grout specifically made for vinyl tile to fill in the gaps I had left inside the firebox. It needs to be troweled on, then the excess wiped off with a sponge before buffing the haze off with a terry cloth towel. You'll need plenty of clean water for this job.
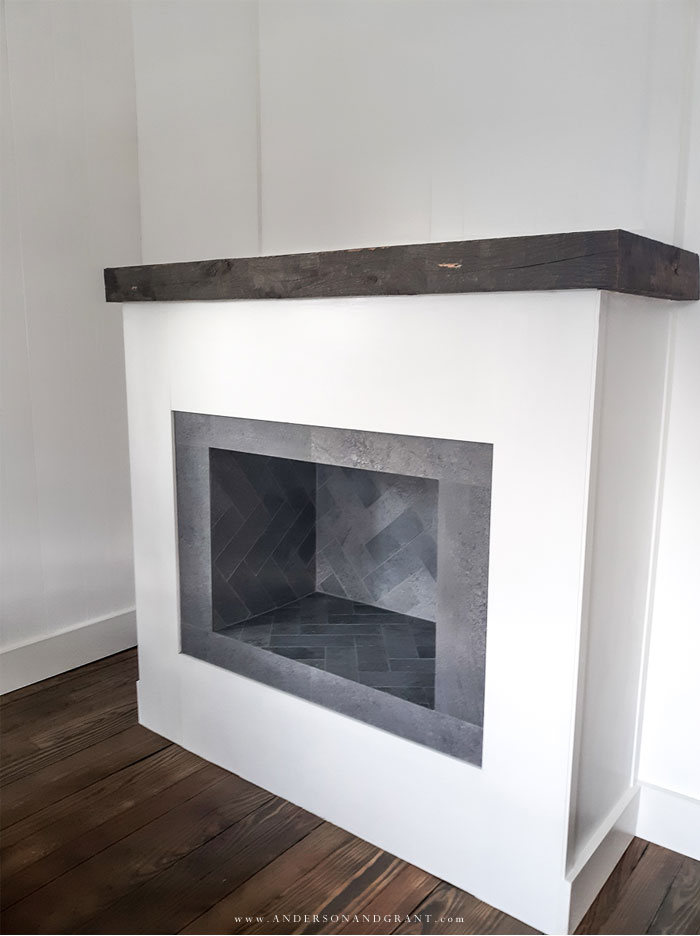
I absolutely love how the fireplace turned out. My only problem is that the beautiful realistic looking logs that I purchased do not work. They are supposed to have realistic flames and can emit "smoke" when they are filled with water. But nothing happens when I plug it all in.
So I am trying to get the company to answer me back about how to fix this issue. For that reason, I don't want to promote their product until I know how they are to deal with.
These logs were the whole reason that I had decided to go with this entire fireplace idea because I really loved how real they looked, so I'm a little sad that they weren't working for me to show you in this post. But I will definitely keep you updated when I know more.

Well, I hope this post has inspired you whether you are looking for a way to build your own modern farmhouse fireplace surround or maybe makeover one that you already have. The possibilities are really endless to what you can create as an electric fireplace.
PIN THIS POST FOR LATER

