Did you know the vegetable scraps and spent chicken bones you're throwing away can be used to make a flavorful, nutritious broth for soups, gravy, and other cooking? Learn all about what ingredients to use, tips for preparing the stock, and exactly how to store it.
COOK + BAKE | Published April 8, 2024

- Why Make Chicken Stock from Scraps?
- Scraps You Should Save and How to Store Them
- Ingredients You'll Need for Homemade Chicken Stock from Scraps
- Supplies You'll Need for Making and Storing Stock
- How to Make Chicken Stock from Scraps
- How to Store in the Fridge or Freezer
- Helpful Tips for Making the Best Chicken Stock from Vegetable Scraps
- Chicken Stock from Scraps Recipe
- Frequently Asked Questions
- Other Tips to Help You Simplify Cooking
Chicken stock is an essential pantry staple and so easy to prepare from scratch.
While "proper" broth or stock is made using a whole chicken and mirepoix of celery, carrots, and onions, it can be easily brewed with vegetable scraps and cooked chicken bones. Parts you're throwing away can be repurposed for a flavorful and nutritious stock even better than what you'd buy at the grocery store.
No real recipe is needed and you throw in whatever you have on hand. Read on to learn more about what you should be saving and the failproof way to make chicken stock from scraps so you never purchase it at the market again!

Why Make Chicken Stock From Scraps?
- In as little as 10 minutes of hands-on prep time, you can mix together the ingredients for a simple stock.
- Save leftover bones and veggie peelings in the freezer until you have enough to make a batch and then dump it all into a pot and cover with water. So simple!
- The cost of chicken stock adds up, especially for organic options. But stock made from scraps you'd be tossing away is practically free.
- Almost anything you can make at-home tastes better and is heathier than packaged options and chicken broth is no different. This recipe is packed with rich flavor and has many nutritional benefits.
- You're in control of salt content and ingredients. You know what is going into it and are sure there is no added food coloring, MSG, yeast extract or preservatives.
- It is no secret that we throw good food away, but even scraps like peels, leaves, corn cobs, and onion skins can be made into something new.
Scraps You Should Save and How to Store Them
It isn't likely you'd have enough bones and vegetable scraps at one time to brew a delicious chicken stock. But the good news is that the leftover ingredients can be stored in the freezer until you've got enough for a batch.
- When you have roast chicken, pull off meat and keep the carcass and bones in the freezer. Don't worry if there is still meat attached, though, as it adds extra flavor.
- Keep a gallon-sized plastic bag in freezer that you fill gradually with vegetable scraps until full. Save the clean peels, tops, skins, and other parts you aren't going to eat. Stick mainly to classic veggies like carrots, onions, and celery that won't be overpowering to replicate the classic flavor of store bought stock.
- In addition to scraps, add whole carrots, celery stalks, and onions you know won't be used before spoiling.
- Things you don't want to add include:
- Rotted vegetables and the bad parts you cut off
- Potato and potato peels
- Strong flavored herbs like cilantro or mint
- Too many of one particular vegetable outside of the mirepoix (carrots, celery, and onions)
- Vegetables with overpowering flavor like avocado, fennel, hot peppers, bell peppers, radish, leeks, brassicas (cabbage, broccoli, kale, asparagus, brussels sprouts, cauliflower)
Ingredients You'll Need for Homemade Chicken Stock from Scraps
When making stock from scraps you don't have to worry too much about exact measurements. As a general rule you want about the equivalent of one large carrot, one stalk of celery, one onion and three quarts of water for every one or two chicken carcass, but use whatever you have available
Here are some specifics about the ingredients you'll need to include for the best chicken stock:
- Water - A basic ingredient, but the water you use matters. If you don't like the taste of your tap water, you likely won't like the taste of your stock. If you drink filtered water, be sure to use that.
- Chicken Bones - The more bones you include, the more flavorful your stock. Aim for at least two whole carcass or the bones from five to six breast or thigh. Rotisserie chickens are great, but avoid seasonings like buffalo, paprika, or BBQ.
- Carrots - Any part of the carrot can be saved for making stock including the ends, peels, and green tops.
- Celery - Save all of your celery scraps including the leaves as they provide the most flavor. Discard any really white or yellow parts which can be bitter.
- Onions - Add outer skin and cut-off top and root ends. While the skins are very nutritious, too many can give stock a bitter flavor. Red onions can be overpowering.
- Peppercorns - The spice gives stock a bold, earthy flavor. Ground black pepper does not dissolve well in stock or provide the same robust flavor, so stick to whole peppercorns or season dishes that use the stock later.
- Salt - Kosher salt is best. Reduce or omit the salt altogether if necessary, or add it directly to dishes you prepare when using the stock.
- Vinegar - While optional, the acid helps release collagen from the bones leading to a more gelatinous stock. Substitute the juice of one lemon per chicken carcass.
A few other optional ingredients you might like to add include bay leaves, fresh thyme, parsley stems, garlic, corncobs, mushrooms, or parsnips.
Supplies You'll Need for Making and Storing Chicken Stock
Here's a handy list of the items you may need when making chicken stock from scratch.
- Cooking pot ★ - a stock pot with lid or 6 quart or larger Dutch oven
- Colander ★
- Fine Mesh Strainer or Reusuable Cheesecloth - for straining out the smaller scraps from the liquid
- Slotted spoon ★
- Ladle ★
- Storage containers for overnight refrigeration and long-term storage (Learn more about storing chicken stock.)

How to Make Chicken Stock from Scraps
It is possible to make stock from scraps on the stovetop, crockpot, or instant pot.
STOVETOP INSTRUCTIONS
STEP 1: Add fresh or frozen veggie scraps and chicken bones to a large stockpot, Dutch oven, or the biggest pot with a lid you have. There is no need to defrost the ingredients.
STEP 2: Cover the contents of the pot with cold water leaving about 2 to 3 inches of room at the top of the pot. If you are very close to the top after covering the scraps, you have too much in the pan.
STEP 3: Add vinegar, peppercorns, bay leaves, garlic cloves, and/or salt if you want.
STEP 4: Bring the liquid to a boil, then put the lid on the pot, reduce the heat to low, and simmer for a minimum of four hours and up to 12 hours. The longer the cook time, the more intense the flavor. You want the stock to be lightly simmering, but not totally still. There is no need to stir the stock as it cooks.
STEP 5: The stock will reduce in volume by 25% to 40% and turn a dark golden brown color. The exact amount of time needed will vary based on how much you are cooking. When it appears done, turn off the heat, uncover the pot and allow the stock to cool for 20 minutes so it is easier to strain.
STEP 6: Use tongs to pull out carcass and a slotted spoon to scoop out the largest scraps. Let them sit in a colander to drain into the sink or a bowl.
STEP 7: Using a ladle, pour the remainder into a container through a fine mesh sieve or colander covered in cheesecloth to strain so that you get just the liquid. Let the strained stock continue to cool on the counter for up to 2 hoursand then store in the fridge overnight.
STEP 8: The next day, the stock should have a layer of solidified chicken fat on top. Scoop off the fat and if desired, use in place of cooking oil for sauté veggies, add it to soup for richness, make gravy or pot pie filling or just discard. Don't worry about getting it all out as the fat adds to flavor.
STEP 1: Add your ingredients to a slow cooker that holds at least 6 quarts.
STEP 2: Cover the contents with water, leaving 1-2 inches at the top of crockpot.
STEP 3: Add peppercorns, bay leaves and kosher salt if desired.
STEP 4: Cover and cook on low for 8-10 hours or high 4-6 hours.
STEP 5: Turn off the heat, uncover and allow to cool for 20 minutes so its easier to strain, then follow the stovetop directions above.
STEP 1: Add ingredients to a pressure cooker that holds at least 6 quarts.
STEP 2: Cover the contents in the pot with water making sure not to go past the max-fill line.
STEP 3: Add peppercorns, bay leaf and kosher salt if desired.
STEP 4: Place cover on and make sure valve is in sealed position.
STEP 5: Set pressure to manual on high for 45 minutes. It will take about 20 to 30 minutes to come to pressure.
STEP 6: Allow it to naturally release pressure for 30 minutes, then move the sealing valve to venting and wait for the float valve to sink down before opening.
STEP 7: Open pressure cooker, turn it off and allow stock to cool for 20 minutes so it is easier to strain. Then follow the stovetop directions above.

How to Store Chicken Stock in the Fridge or Freezer
Homemade chicken stock should be consumed within four to five days when refrigerated or frozen for up to six months. Alternately, pressure canning leaves the stock shelf-stable.
Freeze the stock in quantities you'll use like 2 cups or 4 cups. Some common containers that work well for freezing stock are:
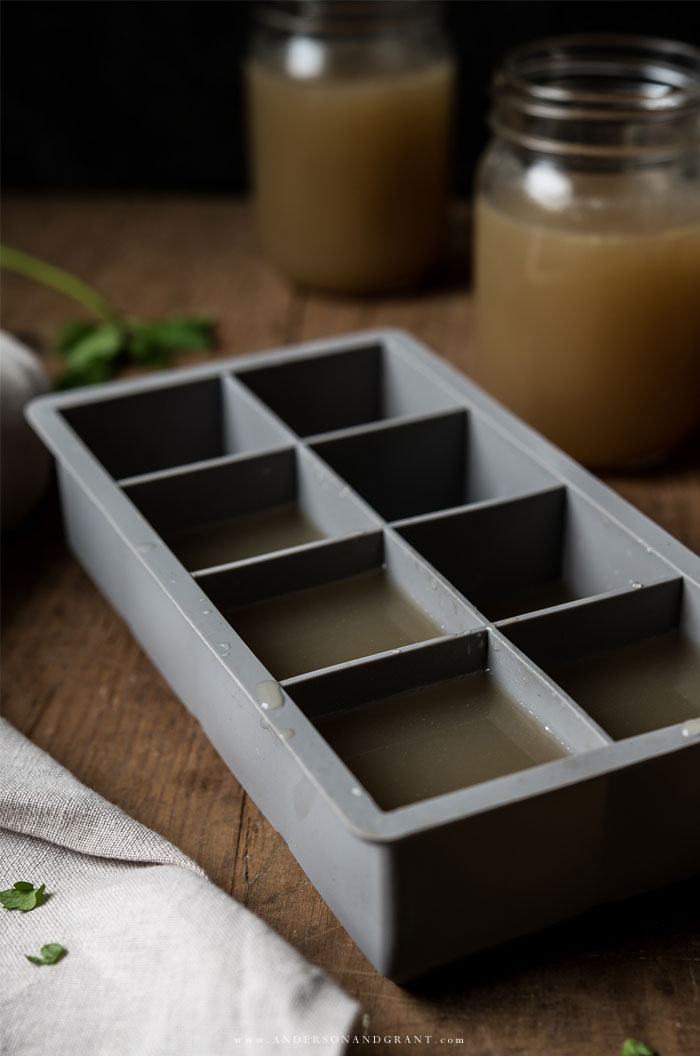
- silicone molds for cubes - My personal favorite option because it allows me to freeze easy-to-store cubes in 1/2 cup measurements making it easy to measure out and thaw exactly how much I need.
- plastic soup containers from restaurant supply stores
- freezer bags - While convenient and cost-effective, keep in mind that holes can easily form and the ziploc bags often leak when stacked.
- silicone bags ★ - A better alternative to plastic bags, but more costly.
- ice cube trays - Great option for small servings allowing you to use a little broth at a time. Muffin tins also work.
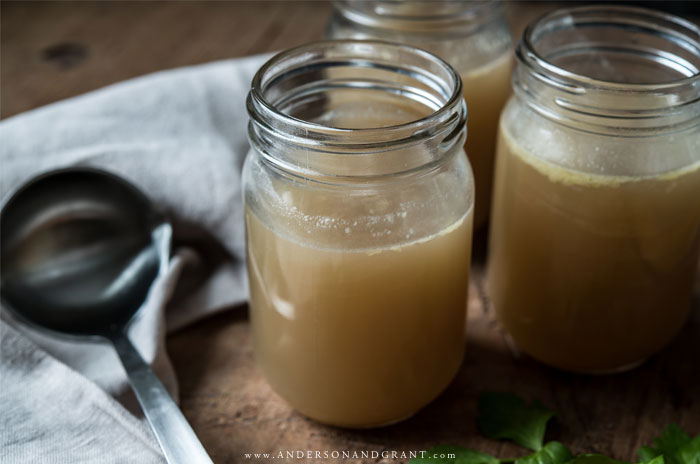
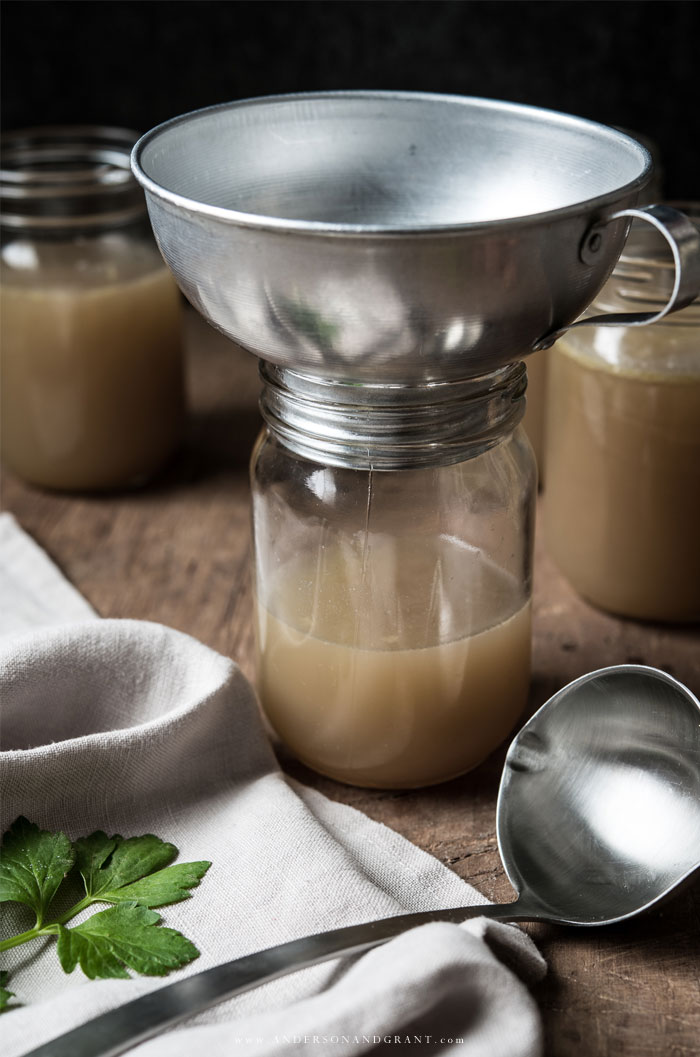
- wide mouth canning jars ★ - Leave 1 inch of head space between top of food and top of jar to allow for expansion during freezing process. Store jars in the refrigerator before moving to the freezer because glass doesn't like sudden temperature changes.
To use frozen stock, remove the amount you need from the freezer 24-48 hours before you want to use the liquid and place it in the fridge. Glass mason jars can shatter when rapidly heated, so it is important to thaw gradually.
If it isn't thawed or you need to thaw the jar quickly, place it in a large bowl or sink basin filled with cool water. Cubes and stock stored in freezer bags can be added to recipes before they are completely thawed.
Helpful Tips for Making the Best Chicken Stock from Vegetable Scraps
- Do not add bad or rotted vegetable scraps to homemade bone broth. If you wouldn't want to eat it, don't use it.
- Make sure all vegetable scraps are washed and free of dirt before freezing.
- Stirring is not necessary and could make your stock cloudy.
- The amount of stock you end up with will be determined by how much water you add and how long you cook it to reduce.
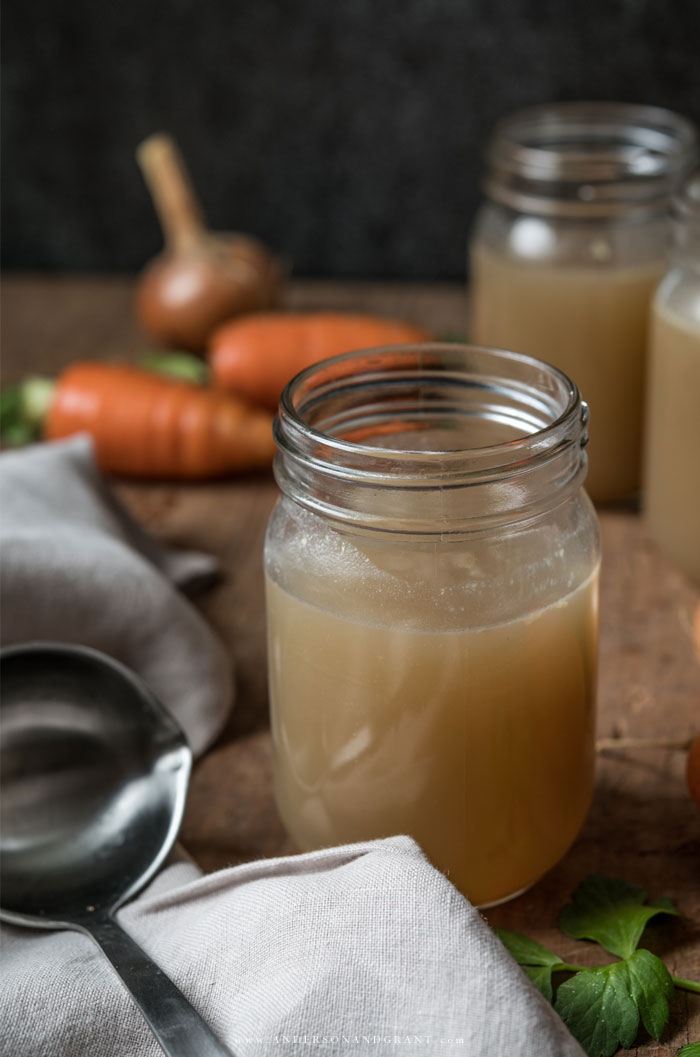
- The color of stock generally reflects how long the bird was cooked and what kind of bird it was. As long as you like the flavor, don't worry about the color. Most store-bought broths and stocks contain turmeric or coloring giving it a richer golden color, so try not to do a color comparison.
- Don't turn the heat to high just to speed up the cooking process. Stock cooked at too high of a temperature may produce a foam on the top. Skim that off and discard to produce deeper cleaner stock. Also, boiling the stock, rather than simmering, will cause the fat from the chicken to emulsify and your stock will be cloudy and greasy.
- This method works for more than just chicken stock. Save veggie scraps to make homemade vegetable stock, turkey bones for turkey stock, ham bones for ham stock, and beef bones for beef stock. (Beef needs to cook longer because the bones are more concentrated.)

Chicken Stock from Scraps Recipe
Stop throwing away vegetable scraps and chicken bones and use them to prepare a flavorful cooking stock.
INGREDIENTS
- Scraps equal to about one large carrot, stalk of celery, and one onion
- One or two chicken carcasses or bones from six to seven breasts and thighs
- 3 quarts of water to cover ingredients
- 2 Tablespoons vinegar
- 1 teaspoon whole peppercorns
- Salt, to taste
INSTRUCTIONS
STEP 1: Add vegetable scraps and chicken bones to large stock pot or Dutch oven.
STEP 2: Cover contents with cold water leaving 2 to 3 inches of room at the top of the pot. Add vinegar and season with peppercorns and salt.
STEP 3: Bring liquid to a boil, then put the lid on the top, reduce heat to low, and simmer lightly for a minimum of four hours and up to twelve hours without stirring. The stock is done when it has reduced by 25% to 40% and is a dark golden brown color.
STEP 4: Turn off heat, uncover the pot, and cool for 20 minutes.
STEP 5: Dispose of larger scraps, then ladle the remaining liquid into a container through a fine mesh strainer. Allow the stock to cool for up to 2 hours and then store in the refrigerator overnight.
STEP 6: Scoop the layer of solid fat off of the surface, then put stock into containers for long term storage or store for up to 4 days in refrigerator.
Frequently Asked Questions
Here are some questions that have been asked about making chicken stock from scraps. If you don’t see your question answered here, feel free to send me an email and I’ll be happy to help.
CLICK ON THE QUESTION TO SEE THE ANSWER
There is much debate about what is bone broth vs stock, how long to boil each type, etc......but there really is not a lot of difference in terms of it's use or flavor, so don't stress over the technicalities when cooking at home. Here is an overview of each:
Broth is made by cooking meat with aromatics (bay leaves, peppercorns, etc), vegetables, water and maybe some bones. It relies on meat for flavoring, simmers in less time and is less robust in flavor. It works well in dishes where you want other flavors to shine.
Stock simmers aromatics and vegetables in water with cooked bones rather than meat. Animal bones release collagen as they cook for a long time and the stock may actually solidify into a Jello-like consistency when refrigerated adding to the flavor, nutrition and body of the stock.
Bone broth cooks aromatics, vegetables, and bones for a long time, extracting even more flavor and nutrients for consumption.
According to the USDA, food stored in the freezer is safe to eat indefinitely. The worry is freezer burn which affects the taste. Try to use whatever you've stored within four to five months for the best flavor.
Stock is the best way to get delicious rich flavor in countless recipes. Some ways that this from-scratch chicken stock can be used are in:
• Soups (my favorites are Potato and Ham Soup, Potato Corn Chowder, and Broccoli Cheddar)
• Stew
• Gravy
• Sauces
• Rice - Use chicken stock in place of water
• Risotto
• Pasta dishes
• Chicken and dumplings
• Homemade cream of chicken soup
• Stuffing - Adds depth and delicious flavor to homemade dressing
• Pot pie
• Nutritious beverage to drink as is when sick
If you boil a chicken in water for chicken soup for a long time, much of the collagen from the skin and bones has already been used in the soup. While the bones and carcass from a previously boiled chicken will lend flavor to stock and can be used again, it won't be quite as thick and rich as with bones from a roasted chicken.
The best part about making chicken stock at home is that any part of the bird can be added to the water, including parts like the neck and giblets that you typically wouldn't use. You can roast a whole chicken, use the bones from chicken breast served to your family, buy a rotisserie chicken, or save the bones from chicken thighs and wings.
Removing skin is a matter of personal preference. It adds flavor, but also contributes to additional fat. Try it both ways and see which you prefer.
To make this particular stock recipe that uses vegetable scraps, I would recommend using already cooked chicken bones. Since you don't need to include the meat to make this recipe, you can cook the chicken, enjoy the meat for a meal, and then make stock.
Chicken stock should last almost indefinitely in the freezer, but the flavor is affected when it is frozen for too long. Dispose of the stock if it takes on a different color, has a weird smell, or is coated in a lot of ice build-up.
You can reuse the bones and scraps for multiple batches of stock and still get nutrition and flavor from bones a second time. Strain and toss everything back into the pot for a second weaker batch great for rice and veggies.

I hope that this article has opened your eyes about how useful the vegetable scraps and bones you've throwing away can be. Now anytime you need a flavorful stock or broth, you can make your own for free.
Other Tips to Help You Simplify Cooking
The Fail-Proof Way to Melt Chocolate - Forget the microwave and stovetop and take a hands-off approach by melting in the oven....
Secret Ingredient to Perfect Scrambled Eggs - Plus tips for getting them done right.
The Right Way to Read and Follow Recipes
Tips for Choosing the Best Cucumbers - And exactly how to store them.
DID YOU ENJOY THIS SIMPLE LIVING IDEA?
Be sure to join the anderson + grant mailing list to get all the tips, projects, and recipes for making your house feel more like home delivered right to your inbox.
Please click on the image below to share it to Pinterest. Not only can you easily refer back to it, you'll help me spread the word so that others will benefit from the post as well!

