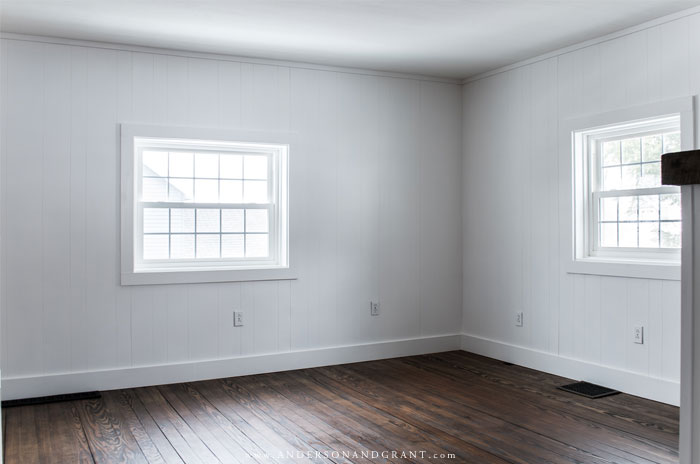
The walls are painted, floors are stained, and trim is installed. That means the end is near for the renovation of my 1900s fixer upper living room. Have a look at the progress that has been made.
MACTAVISH HOUSE | Published January 12, 2020

This post may contain affiliate links which means I receive a small commission if you choose to make a purchase using the link, but there is no additional cost to you. For more information, you can view my disclosure policy.
I can't even begin to tell you how amazing it feels to finally have the dirty demo work done in my living room, allowing me to focus on my favorite part.......making things pretty!
Throughout this whole house, it would have been easy to come in, rip out the old plaster walls, tear up the original wood floors, and start from scratch. If not easy, it certainly would have taken less time. But I wanted to maintain as much of the original 1900s house as I could, and I quickly learned that restoration is much harder and time consuming than just renovation. That said, I'm so proud of how the house is slowly coming to life.
FOLLOW ALONG ON THE FULL TRANSFORMATION OF THIS LIVING ROOM
DEMO IN THE LIVING ROOM
WORKING IN THE STAIRCASE AND ON THE CEILING
REFINISHING THE HARDWOOD FLOORS (scroll to the bottom of the post)
BUILDING A FAKE FIREPLACE

Originally I thought the living room would come together quickly. The paneling was staying on the walls because many years ago, my dad had studded out and insulated this room, and I didn't see any point in removing it for drywall right now. Also, only the outer border of the wood floors in the room had been painted so I assumed they wouldn't take much to sand. Ten months later, here we are.
But as of late, I'm trying to remember to give myself a little grace and realize that there are some days when I can only donate an hour a day (if that) to working on this project and even that has been spotty since about mid-November thanks to the holidays. I am one person doing most of the work myself, and a lot of my time is just spent learning and trying to figure out how to do what I want to do!
Just as a reminder, here is what the room looked like in my before tour a year ago:

Mid-project:


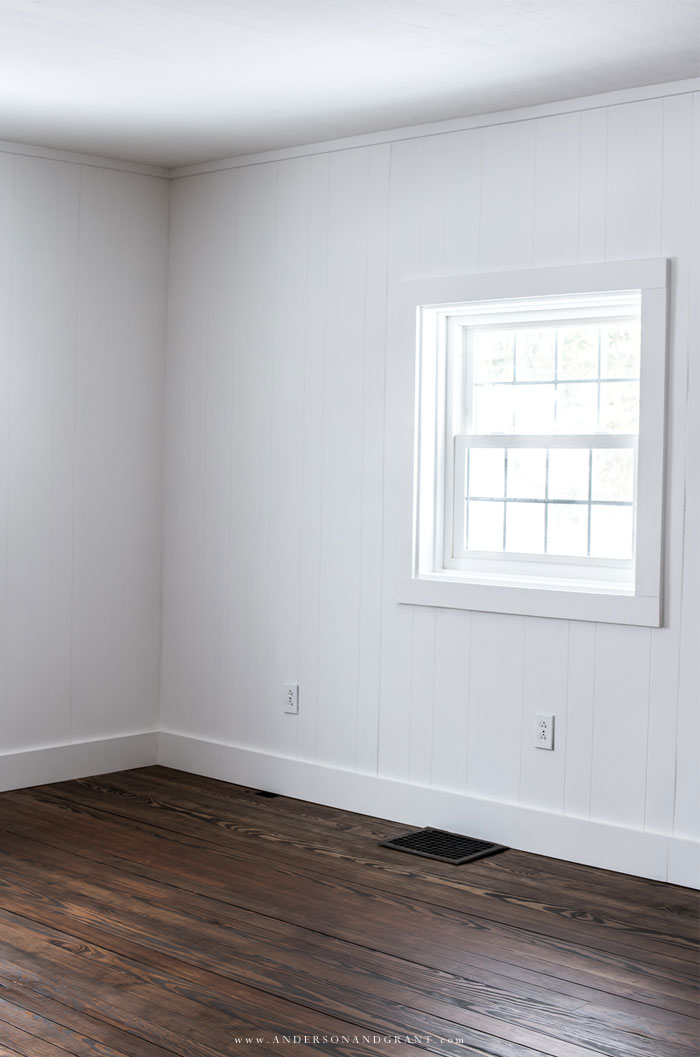
And here is the room now:

As you can see, a coat of paint can really transform dated paneling. It can be expensive to rip out the paneling and install new drywall if you have to hire someone to do it. But if you are trying to stick to a budget and just want a refresh, there is nothing wrong with painting what is there.
You will need to be sure to prime the paneling before painting it so that the paint adheres well. I used BIN primer because it is shellac based and has a special stain blocker in it. The paneling I was painting had very dark stained grooves between the panels and I didn't want that to bleed through the white paint. It is also great at hiding knots when painting bare wood.

All the walls in the room were painted with Valspar Snowcap White in satin from Lowes and the room was immediately transformed. My aunt and I spent one whole day priming and painting the space, but it was fun to see it change so quickly.
It had been a hard place to work in at night as there is no ceiling fixture in the room and the dark paneling and gray plaster ceiling didn't allow any light to bounce around. But now it is like a completely different space, even on gray winter days.
The old plaster ceiling and stairway wall had cracks in it as well as many holes from where the furring strips were installed to hold the ceiling tiles. Those were filled with white caulking and then all of the plaster surfaces were coated with DAP Dynaflex Flexible Spackling and sanded to make them smooth. They aren't perfect by any means, but I'm pleased with how they turned out.
**Please know, I am not an expert in this area but did research what has worked for others and did what I thought was best. We will see how it holds up moving forward and I'll do an update in the future.

Although there wasn't a lot of stain to remove from the floors, what was there was very difficult to remove. My poor mom helped me night after night on these floors. But once every last bit of it was gone, I was so glad that I decided to keep the original wood. The old pine floors are gorgeous and she said that if she would have known they existed under the carpeting, this would have been done a long time ago.
I used Fusion Mineral Paint Stain and Finishing Oil in Cappuccino on the wood and then an additional coat of Natural over the top for added protection. The Natural doesn't change the color of the finish, but it does add a nice sheen over the warm brown stain.

Staining wood is always one of my least favorite projects because I can never get the finish that I want and find it to be very hard to remove. But this stain is amazing and soaks down into the wood rather than sitting on the top as most stains do which makes it very hard wearing and scratch resistant.
What I love most is that it really enhances a beautiful wood grain, like I have here in these floors. The color is exactly what I was looking for and the floors turned out beautifully in this room.
Whether you're doing floors as I did, or looking for a stain for furniture or other projects, I highly recommend this product both for how easy it is to use and for the nice finish it leaves behind. The cans are small but the stain goes a long way. For this room, I used 2 cans of the Cappuccino stain and finishing oil and 2 cans of natural.
I plan to do a whole post about exactly what I did to the floors when I do them in another room of the house, but for now I wanted to focus on learning and experimenting myself before I tried to teach anyone else.

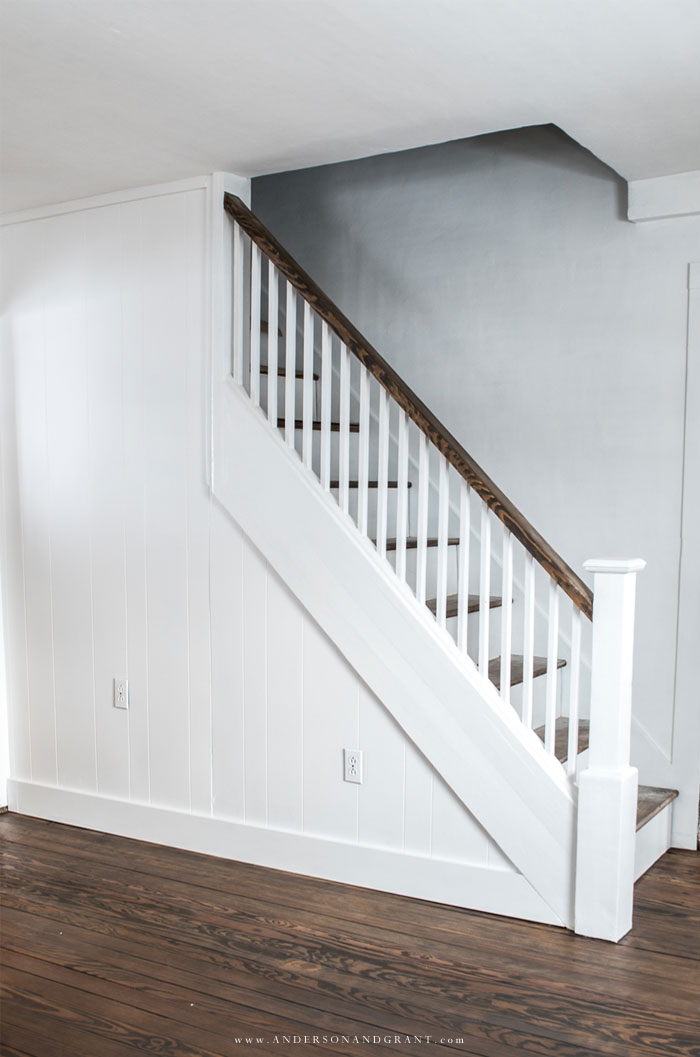
The stairway took quite awhile to remove the seven layers of paint from the railing, spindles, and newel post.....and when I say "layers" I'm talking just about seven distinct colors of paint and stain and am not including how many repaints may have been done in a single color. I found that Multi-Strip paint remover worked the best, although even it had a hard time going through more than one layer at a time with some of the oil based finishes.
Everything for the most part is smooth and really quite lovely though, so it was all worth it in my opinion.
Luckily, the stair treads didn't have as many layers of paint since they had been covered in carpeting. They were stained in the same Fusion stain along with the railing, while the newel post, spindles and trim were painting in Valspar Snowcap White in semi-gloss.
SIDE NOTE:
If you are painting or staining stairs that you need to use while in the process of refinishing them, do every other tread then go back and do the remaining treads when the others are dry. That way, you can take two steps at a time to still go up up and down. In this case, I just worked from the top tread to the bottom since I didn't need to go upstairs until after they were done.
I had mentioned in an older post, the previous homeowners before my grandparents had installed a cardboard ceiling in this stairway likely to save on heating costs. It was a surprise to find it under the ceiling tiles. While it was quite the job working up the stairs to remove the layers of wallpaper on the walls and ceiling, I couldn't be happier with how open it is now.
Fixing the plaster damage is time consuming and so this area actually isn't done and painted.. And there is still some work to do on the stairs, but for now I'm satisfied with their condition and will return to the entire stairwell once I get a few more spaces done in the house.


And finally, I've added trim around the windows using 1x4 inch stock lumber and baseboards out of 1x6 inch stock pine lumber from Lowes painted in semi-gloss paint. The two upstairs bedrooms still have the original baseboards and trim so I wanted to keep with the look of the original house. The 5 inch boards aren't as tall as what is upstairs, but I still love how they turned out.
This was originally built as a coal miner's company home, so they didn't use fancy ornate trim. Things were basic to keep costs down and that actually fits in quite well with my own style now.

I'm sure that you'll agree that this room already looks completely different than it had in my before tour a year ago. Next week, I'll be sharing with you how I'm constructing a faux fireplace for the wall that adjoins to the dining room. And then in two weeks, fingers crossed, you'll get to see it all completely finished! I can't wait to show you how everything has come together.
