A look at the progress that is being made in the restoration of my grandparent's 1900s home.
MACTAVISH HOUSE | Published June 16, 2019
It has been quite awhile since I let you in on the progress at my fixer upper, but I thought that it was finally time to catch you up on what I've been doing. Today I'm going to share what has gone on in the living room and for the sake of keeping this post at a reasonable length, next week I'll have some things to share about the outside!
As the person who is doing the work and seeing the house on a regular basis, it feels like nothing has really changed at all, so I haven't felt like there was much to share. But all of my family members who have seen the house in person see a lot that has been done. So I guess it is all a matter of perspective. While I may be looking at the time invested and all that is still left to do, those who are seeing it from the outside are able to observe a transformation taking place.
The last time I shared the house with you, I had mentioned that for various reasons, I had to leave the dining room "in-progress" and moved to the living room. My belief was that I was now choosing a room that I could finish quickly and feel good about getting something done. Obviously as you can see from the picture below, I was wrong!

Affiliate links are provided in this post for your convenience. For more information, you can view my disclosure policy.
Those of you who have had the experience of restoring an old house will likely understand my dilemma quite well.
Old homes have lots of layers. Wallpaper. Paint. Paneling. As I work on this house, my mind keeps going back to the idea of putting a new roof on a house. To save money, a new roof can be installed over the old roof saving time and work. Eventually, though, all of that has to come off. You can't just keep adding layers to the top of the house.
That is the point that I feel I'm at with this house. A lot has been layered on to freshen things up over the years, but it is time to be stripped back and find the original old base. And that can be a time-consuming process.
The hardest part for an impatient person like myself is that there is so much to get done before moving to the next step. Can't paint until the wallpaper is removed and the floors are sanded because of the dust. Can't repair the plaster until all the wallpaper is down.
FOLLOW ALONG ON THE FULL TRANSFORMATION OF THIS LIVING ROOM
DEMO IN THE LIVING ROOM
REFINISHING THE HARDWOOD FLOORS (scroll to the bottom of the post)
BUILDING A FAKE FIREPLACE
THE LIVING ROOM PRIOR TO ADDING FURNITURE AND DECOR
So what have I done. you ask?
WINDOWS
Let's start with the biggest improvement and that is that the windows were installed a few months ago. It is so nice to see everything match and open properly. And the white looks clean and fresh.
I had originally hoped to enlarge the windows back to their original size, but it was going to cost a lot more so for the most part I stuck with the openings as they were. One of the exceptions to that is the window on the right wall here in the living room. It was actually supposed to be a bigger window in the dining room, but there was a misunderstanding, so while I still wish for a bigger window in the dining room, I absolutely love having a larger window on this wall in the living room because it was quite small.

PLASTER CEILING
The plaster ceiling had three layers of wallpaper on it. That has all been removed.
There are a few places where the plaster needs to be reattached, a few cracks to repair, and the holes need filled from the nails that held the furring strips in place. Then the plaster needs primed and painted. Overall the ceiling is in great condition.
FLOORS
While you can see the carpet is still down, I have pulled it back and removed the carpet strips around the room. Right now, it is just serving as a very large drop cloth to protect the wood floors underneath. I'm hoping to get those sanded and stained soon.
WALLS
I'm leaving the paneling up on the walls right now and will just be painting it, partly to get the project moving along and partly because the paneling is hiding the wiring to the newer receptacles in the room. But, I made the decision to remove the paneling on the staircase wall and up the stairs, exposing of course, three more layers of wallpaper.

STAIRCASE
The staircase was covered in seven coats of paint and stain. The top few layers were water-based paint, but everything underneath was oil based and the stripper would work to only remove one layer at a time. After stripping many layers off, my mom took over this job and has pretty much sanded the railing and newel post down to the original wood. I've got a little more work to smooth out the spindles, but this is finally nearing completion as well.
The carpeting was removed from the stairs and I'm working on striping the (thankfully) two layers of stain on the stair treads, and then they will be stained along with the newel post and railing, while everything else will be painted.
It was soooo close to be done, anxiously anticipating finally being able to pop open the cans of paint and primer to freshen up the room. As I was scraping what I thought was the last little bit of wallpaper off the walls in the stairway, I made the comment to my mom that although it would be fantastic if the ceiling was higher in the staircase, it was actually nice that in an old home they had low ceilings here because I was able to remove the wallpaper and paint right from the steps. No ladder or stretching necessary.
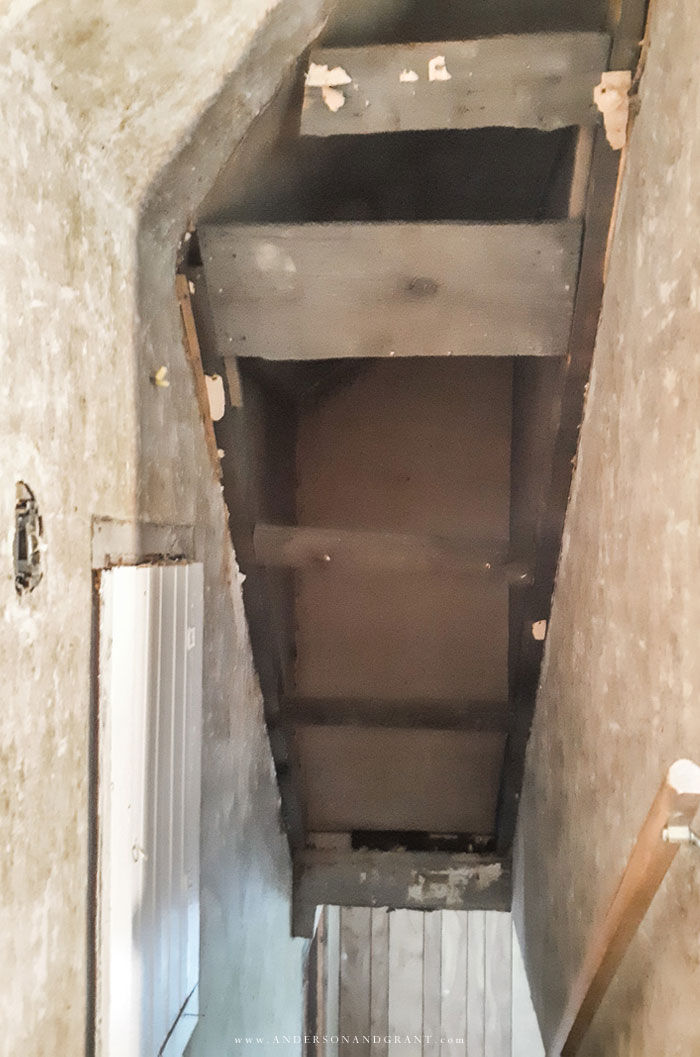
My next step after making that comment was to remove the ceiling tile from the stairway. And do you know what I found under the ceiling tile? A cardboard ceiling. And no, I'm not kidding.
Obviously, I didn't want a cardboard ceiling so I started taking it down.
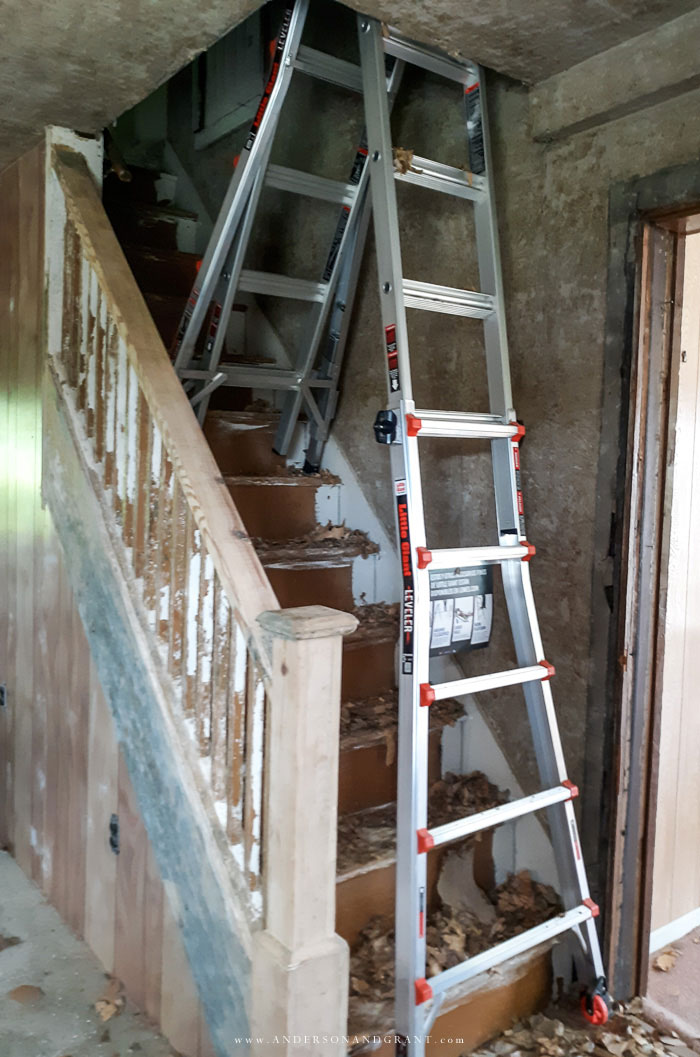
And you know what I found under the cardboard ceiling? That the previous homeowners had dropped the ceiling and that I really did have a normal 15-foot-tall-at-the-base-of-the-steps ceiling. And yes, there was three layers of wallpaper to take down here, too.

That discovery slowed me down a bit because I then needed to get to Lowes to buy a ladder that I could use on the steps. I probably have a few more hours to spend on the top portion before I can officially claim the wallpaper removal to be done....in the living room.

The exciting part of this find (aside from the fact that exposing this really opens up the stairway) was that the old wood beams attached to the wall are actually the perfect rustic boards that I've been looking for to construct a mantel for my future fireplace. Silver lining, I suppose.
So that catches you up a bit on what has been going on in the living room. In addition to the windows, I had two doors replaced and the siding is being installed as we speak. I've also done a little work on the porch and trimmed bushes, so hopefully I'll touch base with you again next week to share some updates outside.
