A before tour of my 1900s fixer upper before it gets a modern farmhouse makeover.
MACTAVISH HOUSE | Published January 17,2019

It has been quite awhile since I first announced that I had plans to renovate my grandparent's old house. And while I'd love to say that the house is done and just hasn't been shown yet on the blog, I'm afraid that I can't. Nothing has been done yet.
But the good news is that the renovation is finally starting and I wanted to let you get a glimpse of the fixer upper house in all its before glory before I touch a single thing.
I must say as a blogger it is so hard to snap before pictures of a space like this and not go all perfectionist wanting to make them look as good as possible. But with a fixer upper that is a little difficult, and I guess you want the pictures to really look their worst so that the final after pictures look even more transformative, right?
As you'll be able to see the house is in pretty rough shape as no one has actually lived here for over four years and it needed work even when my grandma was still there. But I know there is a lot of potential hidden underneath the surfaces and am really excited about being able to make it my own.
Plus, we've had a lot of people in and out of this house between two weekend of estate sales and many family members gathering mementos and helping to box up what was to be donated. Because we all knew I was tearing things apart anyways, we weren't exactly need in our efforts. Needless to say, please excuse the condition of things here.....You are getting true before pictures of the space!
I'll just be doing a quick overview of the house and my plans today, but will go more into details as I begin each separate space. I will say that there are lots of different finishes and materials from room to room and nothing is quite centered in any space, which is hard for a simple and cohesive person like me to tolerate. But....that is all something that can be fixed.
So, let's begin our little tour, shall we?
TAKE A BEFORE TOUR OF MY FIXER UPPER HOME
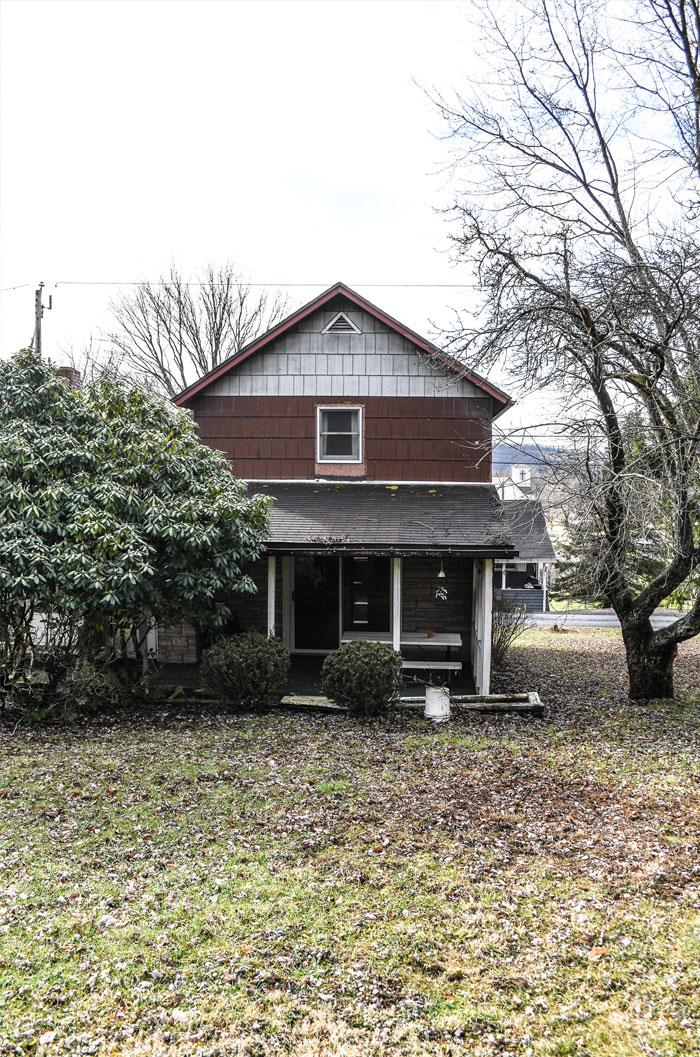
The house was built in 1900 and sits on a third of an acre of property just outside of my town.
The area was originally formed as a mining community and the houses were all company homes built to look pretty much alike, although after all these years each home has been modified in different ways so it isn't quite as noticeable that they are all built with the same floorplan.
The immediate neighborhood it made up three roads situated up a hill and my house sits on the middle road. While it sits pretty close to the road, there is a very large backyard. This pair of pictures is of the front of the house and you can see how close the road is by the location of the mailbox in the picture on the right. The picture above is actually of the back of the house....I've always felt like this house looks a little backwards!


In the fall I had to trees removed from around the house....A very old maple that I was sad to see go was pretty rotted and leaning towards the house and six pine trees that had long ago stopped looking decent that were removed along the front of the house and at the head of the driveway.
You may notice some patches of dirt where there is no grass growing and that is where the trees were. I should have taken some better before pictures, but the trees were taking down quickly to comply with a request from the insurance company. While this has allowed a lot more light into the house which I love, it made the outside look even more like a fixer upper than it did when it was able to hide behind the trees.

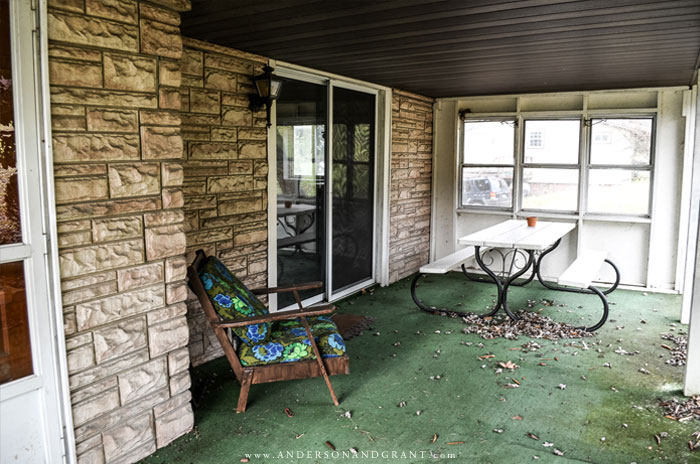
The back porch is covered and stretches along the entire back of the house. Eventually I'd love to make really make an outdoor living space and extend the landscaping into the yard with a dining area and fire pit. But.....for now tearing up the outdoor carpeting off of the concrete and trimming back the gigantic rhododendron bush growing up over the roofline will have to do!
In the spring, I will be having new siding installed and doors and windows put in.

We've always used the back door off the porch as the main entry to the house. As you walk in, this small space was used as a pantry, but my plan is to remove the cupboards and make it a proper entryway/mudroom space. The wall behind the brown metal cupboard is angled to conceal a pipe, but I'm hoping to remove that wall and box in around the pipe to create a little more breathing space.


Just off to the left of this space is the only bathroom in the house. My plan is to choose one tile for the entryway and bathroom to keep things from looking broken up and smaller. Because of the limited space, I'd also like to install a sliding barn door so that the bathroom door doesn't have to swing out into the entry. And I'm going to convert those closed cupboards surrounding the bathtub into open shelving and install tile around the tub.


Stepping out of the entryway puts you in the kitchen and through the kitchen is a space that used to be a porch before my grandparent's had it enclosed.

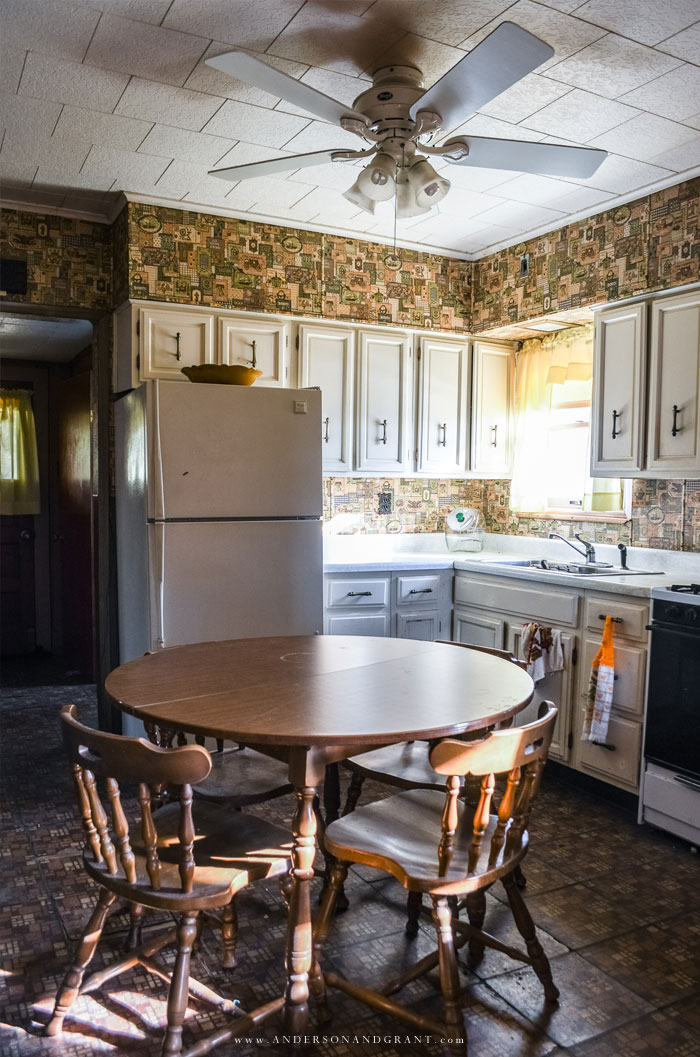
My big plan (and probably only really major renovation of the house) is to take down the wall between the two rooms and make it one large eat-in kitchen. I'm picturing an island in the center of the space. And I'd like to see the removal of the upper cabinets along both walls while building floor to ceiling cupboards along the empty wall.
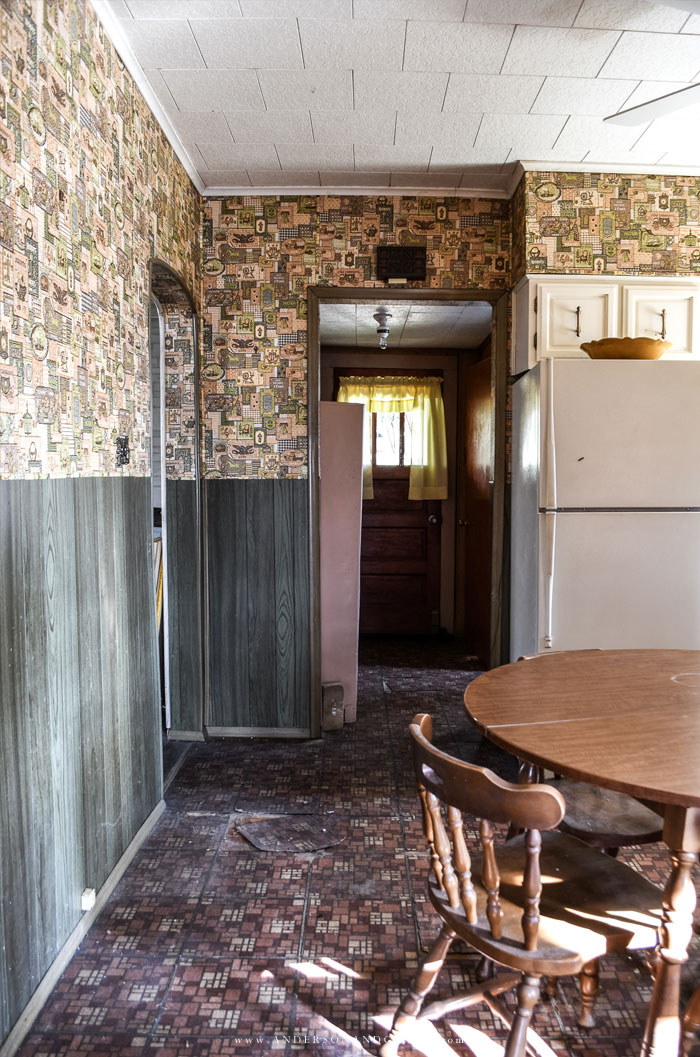
I'm also planning on relocating the refrigerator to create one long solid countertop surface, although at this point I'm not sure where it will live. As you look into the kitchen from the dining room next door, all you can see is the side of the refrigerator and I'd like to see things opened up in the room allowing some more light to bounce around the space.

The enclosed porch area will become a breakfast nook with a table and chairs.
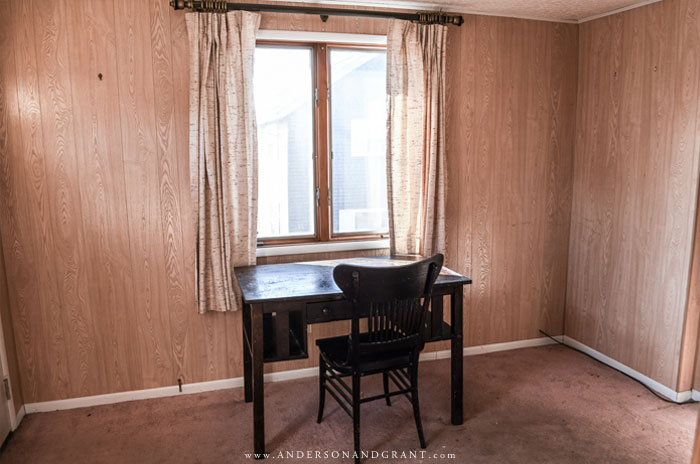
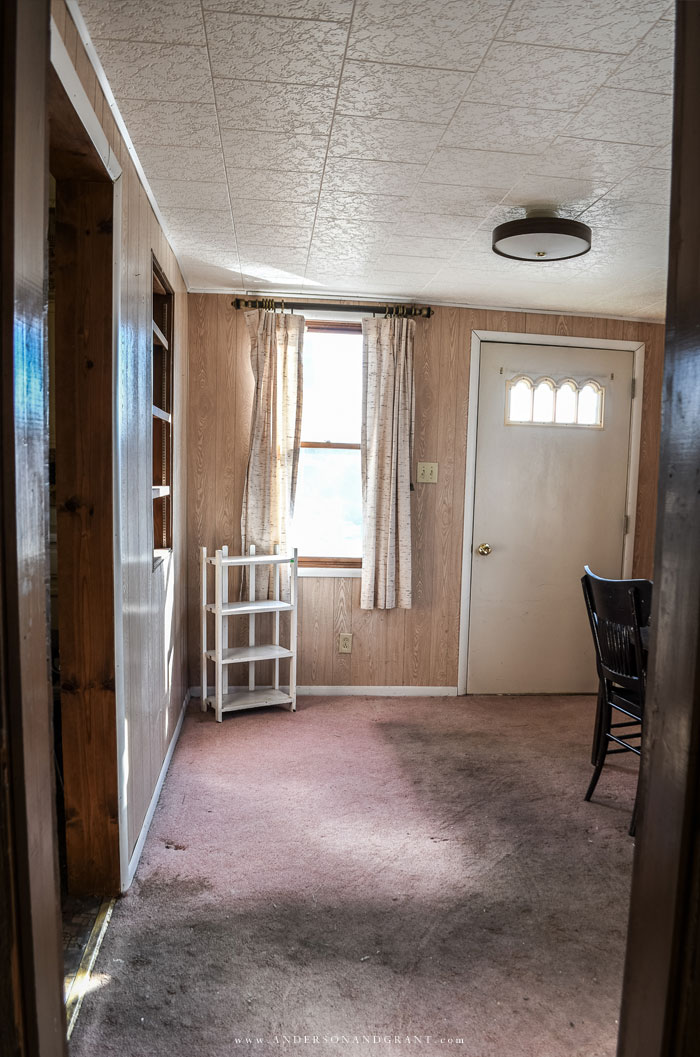
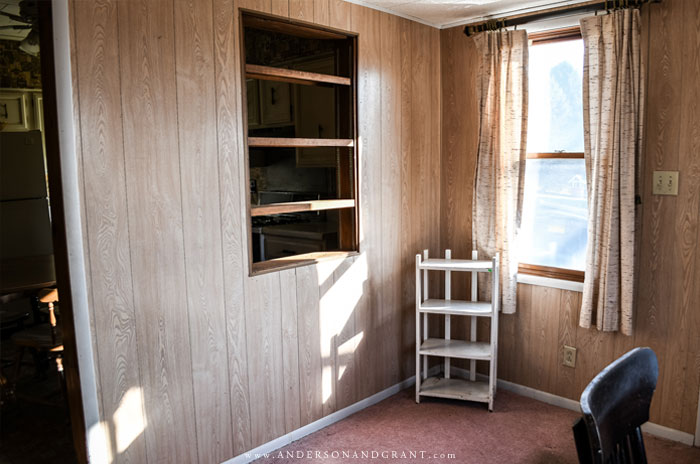
Beside the kitchen is the dining room. It leads back out to the porch through the sliding doors and also has the door to the basement beside the living room opening. This is where I'll be starting the renovations as it shouldn't need anything too major done to bring it back to life.


The living room is a nice size for the house and aside from painting and filling it with some furniture, my other plan for the space is to build a faux fireplace likely on the wall connecting to the dining room.
CLICK HERE TO SEE THE LIVING ROOM BEFORE + AFTER


The stairs to the second floor is in the living room and they lead directly into the first of two bedrooms. While the open space is not ideal for someone with a family, there is really no point right now in trying to put up walls to make this a true room so I'm working with what is here.


Beside the top of the staircase is the door to the second bedroom, which is currently being used for storage and will eventually be an office/walk in closet.
The ceilings are pretty low up here so it will be important to find furniture and a light fixture that don't make them appear any lower than they already are.
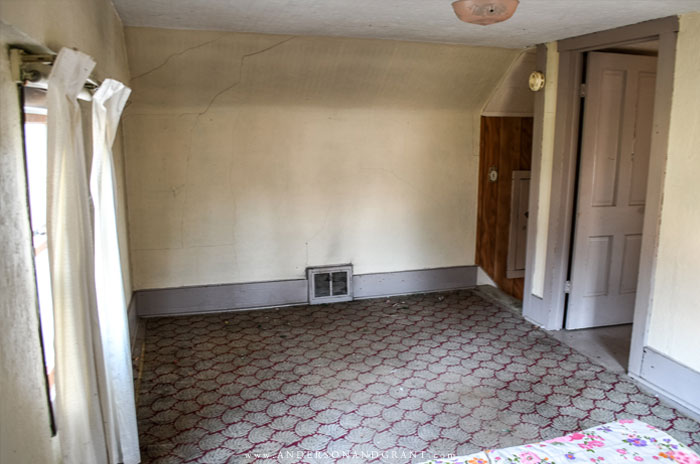
It is normal for homeowners to focus on the areas of a home that others see most, like the kitchen and living room, and leave the bedrooms at the bottom of the renovation list. That may be why this room is probably the most untouched and original in the house with the uncovered plaster walls, tall baseboards, old door, and (painted) wood floors that are exposed underneath the rug.
The more I look at this house, the more I realize that this project isn't so much about adding anything but rather removing the layers that have been put on over the years.....Removing the paneling and carpets and coats of paint to uncover a bit more of the original house.
I know that there are old wood floors that have been painted underneath the flooring and rug in the dining room, but I'm not sure if it continues through the living room and kitchen. I'd love to keep the original wood if it exists in all the rooms, but if it doesn't, I plan on laying new wood floors throughout the first floor.
Each room also has wood paneling and ceiling tiles covering up the original plaster (and likely layers of wallpaper). I know the plaster walls have some cracks in them upstairs, but I'm hoping that for the most part the walls are still in good condition behind the layers and can just be painted.
I hope you've enjoyed this tour of the house I'll be renovating. I know some of my blogging friends have been anxiously anticipating pictures to see what I have to work with and I've made you all wait quite awhile!
Even though I have a general idea of what I'd like to do here, I'd love to hear your thoughts about design ideas that you thought of while taking the tour or any renovation tips that you'd like to share.
SOME MORE POSTS YOU MIGHT ENJOY
CREATING A COHESIVE DESIGN FOR YOUR HOME that will save you time and money
