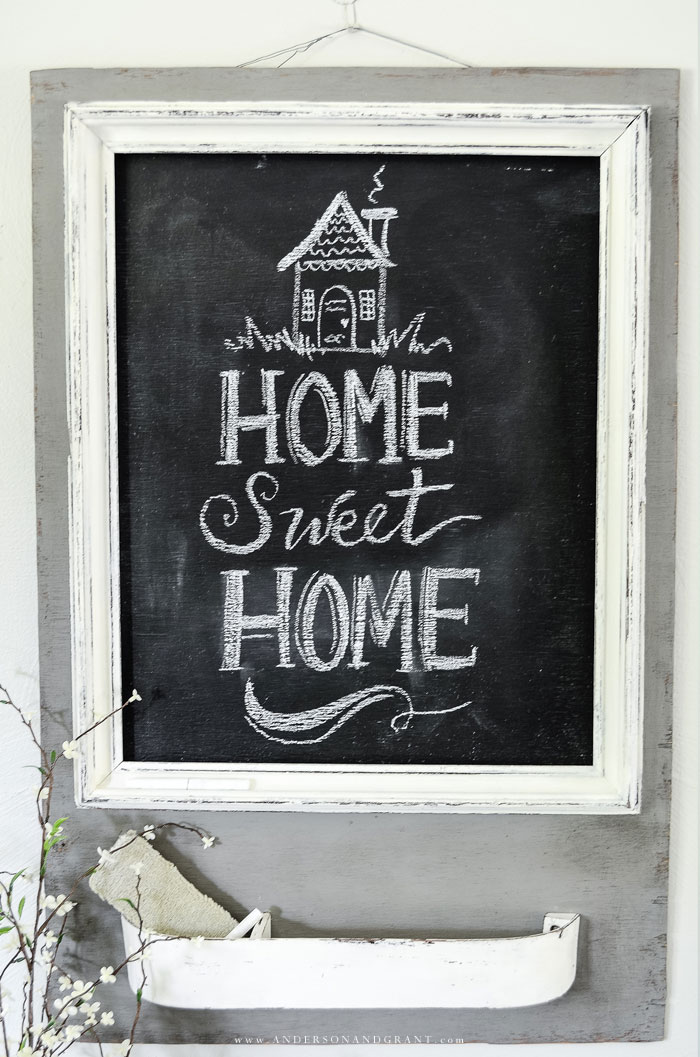
Create a useful home message center chalkboard for your mudroom or kitchen using a wood frame and other repurposed thrift store finds.
CREATE | Published March 6, 2019

One of my favorite things to do is to refurbish "junk" into something else. Sometimes, the junk has to sit awhile before I figure out what to do with it, but eventually I come up with something. I love the challenge of figuring out another use for something I've purchased......a way to give new life to something being cast aside.

This post may contain affiliate links which means I receive a small commission if you choose to make a purchase using the link, but there is no additional cost to you. For more information, you can view my disclosure policy.
On a shopping trip to one of my favorite "junk" dealers awhile back, I picked up a board that had hinges on the side, fancy wood trim and scalloped edge on the bottom, and a wooden compartment sticking off the back. I honestly had no clue what this might have been when I bought it, but I loved the shape and detail of the board.
After purchasing a sewing table to refurbish recently, I noticed there had obviously been a door on the front of the table. The realization hit that what I had bought was the door off of a sewing table. (Sometimes it takes awhile to even figure out what the "junk" is that you bring home!)

While I haven't done anything with the door yet, I decided to pair the compartment from the back of the door with a large, thin board from my scrap wood pile and a frame I bought at an estate sale last year.
Although they are three random pieces, combining them creates a beautiful and functional chalkboard message center. This is the type of piece you can hang in your mudroom to write messages and reminders for your family, hold the incoming and outgoing mail, store your keys, and......whatever else you can think of!

HOW TO MAKE A REPURPOSED CHALKBOARD MESSAGE CENTER
TO MAKE A SIMILAR CHALKBOARD MESSAGE CENTER, YOU'll NEED:
- Wood picture frame without glass
- Something to use as a compartment on the bottom, like a vintage cheese box or wire basket
- Scrap board based on the size of your frame and basket
- Paint (My preference is Fusion Mineral Paint)
- Aging paste wax (optional)
- Chalkboard paint
- Screws
- D-Ring hooks
To make this chalkboard, I began by painting the frame and compartment creamy white and the board gray. I really like the contrast of these two colors. (For similar colors, you can use Fusion Mineral Paint in Champlain and Algonquin).

The painted areas were then aged with an aging paste wax, also from Fusion using a wax brush to apply it and clean rag to wipe it away. The wax will settle into the imperfections in the wood, and I also like to add a little more to the edges of the board where normal "age" would gather.

After allowing the wax finish time to cure, I painted a rectangle filled with three coats of chalkboard paint in the area that would be framed on the board. It is easier to do this before the frame is attached. Just place the frame where it will be installed and trace around the inside of the frame so that you know the area that needs painted.
When the three coats of chalkboard paint were dry, the frame and compartment were attached to the board using screws from behind the board. Two D-ring hooks were attached to the back of the board allowing it to hang securely on the wall.

I am thrilled with how this turned out. I had rolled the idea around in my head for quite awhile before finally putting the project together. I love how distressed and worn everything is, including the board I built it on....There is a lot of chipping and marks in the wood, but that is perfect for pairing with the two old pieces. Everything looks like it goes together. Perfection!
This updated post was originally published on June 4, 2014.
SOME MORE POSTS YOU MIGHT ENJOY
Joanna Gaines Inspired DIY DUTCH TULIP CRATE
DIY STORAGE BASKET made from repurposed kitchen pot
