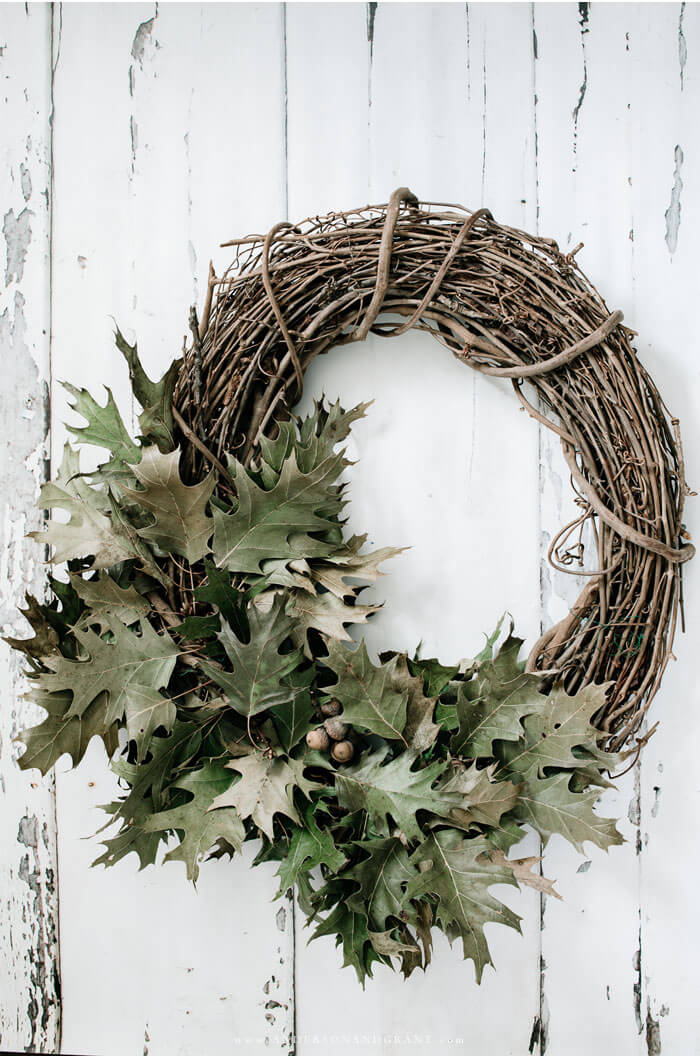
Learn how to create an easy DIY wreath for your fall front door using preserved oak leaves and a grapevine wreath.
FALL | Updated August 24, 2023

At my house this year, decorating is all about keeping things simple and uncluttered....
Not "I just went to Hobby Lobby and spent $100 on new decor" (been there, done that).
One of the easiest (and most budget-friendly) ways of not over complicating your fall decorating is to turn to nature both as your inspiration and as a source for your decor. Through the years I've used fall leaves gathered outside in numerous different ways: to create centerpieces, tucked into vignettes, I even made a fall "tree" used dried leaves one time.
This year, I was inspired by the outdoors to make a wreath to decorate the front door of MacTavish House for fall.
This DIY couldn't be any easier and I hesitated to even create an entire post about it, but sometimes it is the simplest of ideas that we often don't think about until we see someone else doing it. So, here is everything you need to know about how I created a grapevine wreath adorned with dried oak leaves just in case you want to make one for yourself.

This post contains affiliate links which means I receive a small commission if you choose to make a purchase using the link, but there is no additional cost to you. For more information, you can view my disclosure policy.
Where Can You Get Preserved Leaves
The leaves I use in my fall decorating are always gathered straight from the outdoors. I'm lucky to live in a neighborhood surrounded by trees, and the oak trees often drop entire branches of leaves as the season progresses.
They pretty much dry themselves laying on the ground and finish off in the house once I bring them home. I don't know the "proper" way to dry and preserve leaves, but I do have four different techniques that I've used in the past.
You can begin looking now for branches that have fallen or ones that you can cut, depending on the color that you're looking for. Obviously green oak leaves are available early on in the season (or summer), whereas if you want a wreath of colored leaves, you'll have to wait a bit for the fall season to progress.
And you can always gather them when the color is right and store them carefully to use next year.
If you don't have the availability to gather your own leaves around home or a local forested area, you can buy preserved leaves online or in different craft stores. Etsy has a lot of different options with RusticHouse11 having the prettiest green oak and burgundy oak bunches that would be ideal for this project. Roxanne's Dried Flowers also has a nice variety of dried leaves.

What Other Supplies Are Needed
For your convenience a full supplies list and instructions appear futher on down in the post. But allow me to walk you through exactly what I used and did to create this DIY dried leaf wreath.
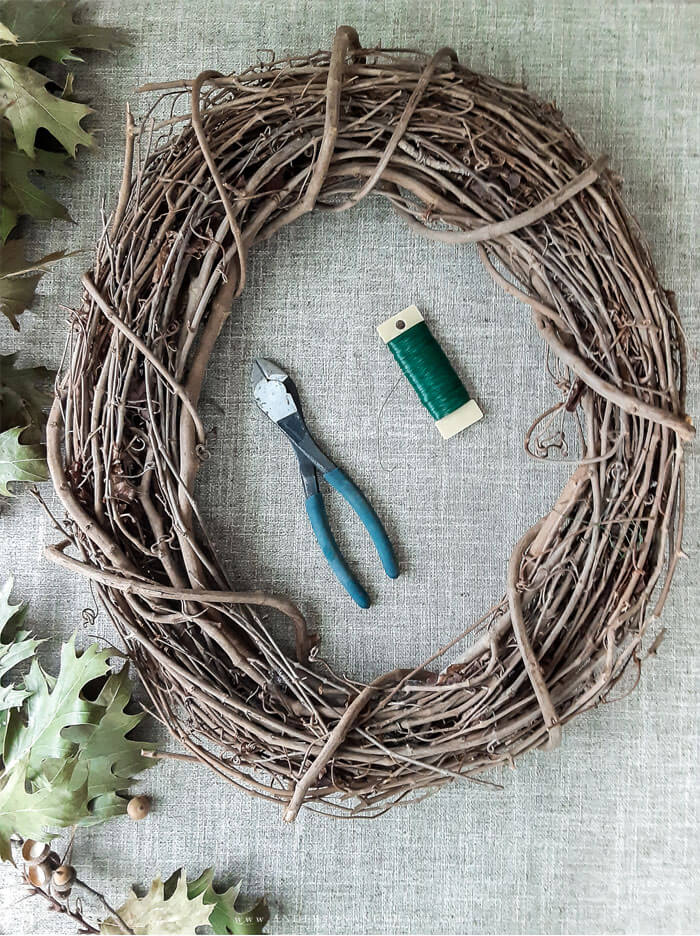
- grapevine wreath - I already had one of these on hand discarded from another project, but grapevine wreaths can be found at any craft store, online, or even at your local thrift store. You'll want one that is about 18 inches for a standard front door if that is where you're hanging it. This particular one had previously been soaked and bent into an oval shape, but you can buy one in an oval or a standard round wreath will work just fine.
- floral wire - You'll need floral wire to attach the branches onto the grapevine wreath. You can buy brown grapevine wire that won't be seen at all on your wreath. But I used ordinary green floral wire because it is what I had on hand and you really don't notice it when the wreath is done.
- wire cutters
- acorns - (optional) I was lucky enough to find some branches that had the tops of the acorns still attached, so I gathered some fallen acorns to glue back into the tops for an added detail
How to Make a DIY Dried Leaf Wreath
STEP 1: Begin by sticking the branches directly into the grapevine wreath if possible. Not everything needs to be wired in as a lot of the branches will be held just fine inside the grapevine. However, if your wreath is open to the elements and wind, you'll want to be sure to attach each branch securely. Be careful as you're working with these leaves as they are likely dry and somewhat brittle.

STEP 2: In areas where you cannot stick a branch or the branch is too flimsy to be tucked in, use a little floral wire to attach the branch to the wreath. Trim the excess wire with wire cutters.
STEP 3: Continue tucking in branches to completely cover the side of your wreath and filling in empty spaces with individual leaves if necessary. Make the wreath as full or sparse as you'd like.

STEP 4: (Optional) If you have branches with acorns attached or just the tops of the acorns, you can hot glue the acorn bottoms into the tops. If the acorns are already inside the tops you'll still want to glue them if possible because as they dry they will fall out. This is a nice decorative detail, but not something you have to do.

STEP 5: Add a loop of wire or jute twine to the back of your wreath so that it can be hung from a hook on your door or wherever you'll be displaying it.
STEP 6: Make it your own.
I opted to keep my wreath simple and focused on just the leaves.
But you can add other things to your wreath that will dry like thistle, berries, or pieces of sedem. Or perhaps you'd like to add a bow of some sort. Customize it by choosing the type and color of leaves that you love and accenting it in a way that fits in with your own style.
The best part of making things yourself is that you get to design it according to your style and preferences!

Frequently Asked Questions
CAN THE ENTIRE WREATH BE COVERED IN LEAVES?
Absolutely! I opted to do a wreath with just one section filled with leaves and acorns, but if you want to cover the entire grapevine wreath, that would be beautiful as well. You'll follow the same steps outlined above only you'll tuck leaves in the whole way around.
CAN ANY TYPE OF LEAF BE USED?
I love oak leaves and always seem to gravitiate to using them around the house. But any type of leaves will work in the same way for this DIY wreath. Each variety may dry in a slightly different way and the colors may change a bit, but feel free to try your favorite.
WHAT SHOULD BE DONE WITH THE WREATH WHEN FALL IS OVER?
The best part about a natural, homemade wreath like this, is that you can tear it apart and use the wreath for something else if you'd like because it can always be made fresh each year.
If you do intend to save it for another use, you'll want to be sure to store it flat in a sturdy box (or plastic wreath storage box). The preserved leaves are fragile and will break apart if jostled around or pushed into a box with other items.
Other Homemade Fall Decor DIY Projects You'll Enjoy
- Hand Painted Pumpkins for Sale Sign
- Chalk Painted Heirloom Style Pumpkins
- DIY Realistic Looking Pumpkin Stems - You won't believe what these are made of!

HOW TO MAKE A DIY PRESERVED LEAF WREATH
Learn how to create an easy DIY wreath for your fall front door using preserved oak leaves and a grapevine wreath.
SUPPLIES
- Grapevine wreath (any size depending on what will work best for you)
- Preserved leaves
- Floral wire
- Wire cutters
- Acorns (optional)
- Hot glue (optional)
INSTRUCTIONS
STEP 1: Begin by sticking the branches directly into the grapevine wreath if possible. Not everything needs to be wired in as a lot of the branches will be held just fine inside the grapevine. However, if your wreath is open to the elements and wind, you'll want to be sure to attach each branch securely. Be careful as you're working with these leaves as they are likely dry and somewhat brittle.
STEP 2: In areas where you cannot stick a branch or the branch is too flimsy to be tucked in, use a little floral wire to attach the branch to the wreath. Trim the excess wire with wire cutters.
STEP 3: Continue tucking in branches to completely cover the side of your wreath and filling in empty spaces with individual leaves if necessary. Make the wreath as full or sparse as you'd like.
STEP 4: (Optional) If you have branches with acorns attached or just the tops of the acorns, you can hot glue the acorn bottoms into the tops. (If the acorns are already inside the tops you'll still want to glue them if possible because as they dry they will fall out). This is a nice decorative detail, but not necessary.
STEP 5: Add a loop of wire or jute twine to the back of your wreath so that it can be hung from a hook on your door or wherever you'll be displaying it.
STEP 6: Make it your own. Keep the wreath simple and focus on just the leaves. Or add other things to your wreath that will dry like thistle, berries, or pieces of sedem. Or perhaps you'd like to add a bow of some sort. Make it your own by choosing the type and color of leaves that you love and accenting it in a way that fits in with your own style.
HAVE SOME EXTRA DRIED LEAVES LEFTOVER FROM MAKING YOUR WREATH?
Check out how I made a simple fall tree using a styrofoam cone.


