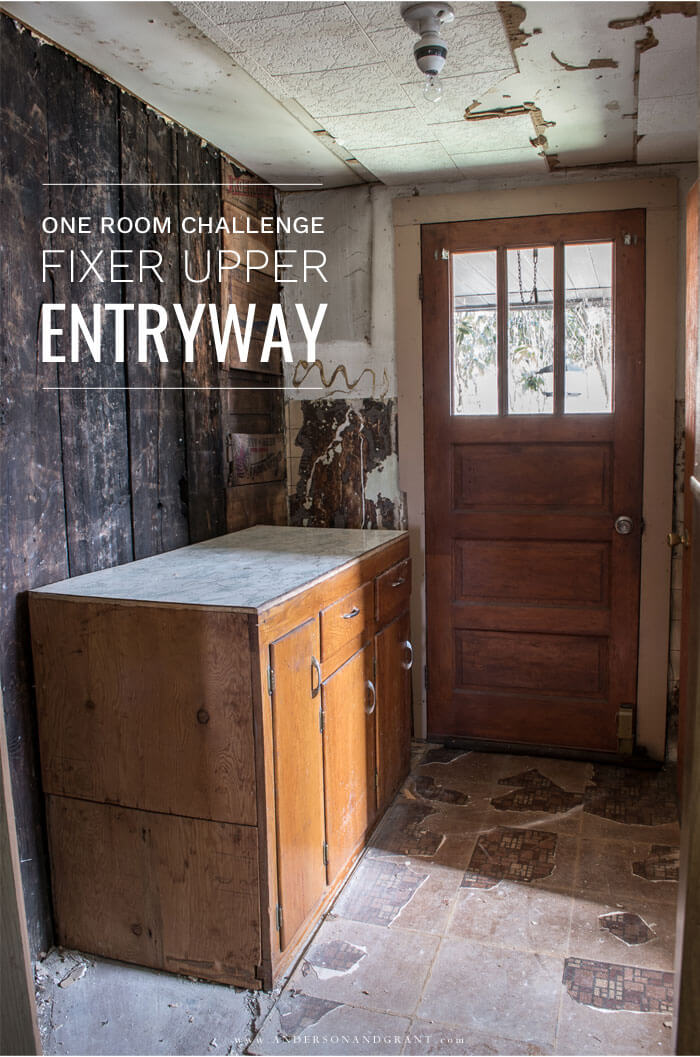
The dirty work is (hopefully) completed in my fixer upper entryway. See what I found underneath layers of paneling, linoleum, and old drywall.
MACTAVISH HOUSE | Published May 13, 2020
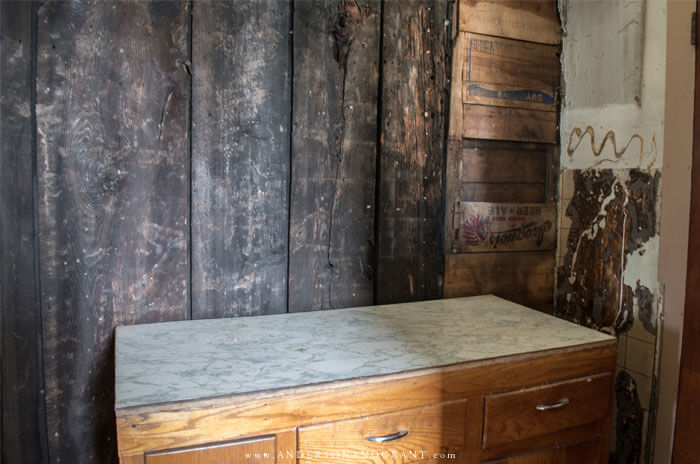
They say that things have to get worse before they get better. It is week two in the One Room Challenge and that's definitely the case here in my fixer upper entryway, although I guess one could argue that the room looked pretty bad to begin with!
Considering all the demo in the house that I've done so far in the living room, dining room, and breakfast nook, this entryway is by far the worst room. As I mentioned in my last post, this space was added on long after the house was built to put the bathroom in, so the flooring and walls are not original to the 1900s house. And the more layers that are pulled back here, I kind of get the feeling that maybe this was more of a DIY room than it was built by someone who was skilled in the trade. You'll see what I mean.
Considering all the demo in the house that I've done so far in the living room, dining room, and breakfast nook, this entryway is by far the worst room. As I mentioned in my last post, this space was added on long after the house was built to put the bathroom in, so the flooring and walls are not original to the 1900s house. And the more layers that are pulled back here, I kind of get the feeling that maybe this was more of a DIY room than it was built by someone who was skilled in the trade. You'll see what I mean.
Before we get into what I uncovered, I want to say a giant thank you to all of you who took the time to email me or comment on last week's post sharing your excitement and ideas for what I could do with this little room. It is so helpful to see the space through other's eyes. A lot of people suggested a barn door or pocket door (one of which is in the plan!), while others thought about using wall sconces instead of an overhead light, installing vinyl flooring, and changing out the entry door to allow in more light. Next week, you'll get a chance to learn exactly what plans I finally decided on.


But today is all about demo.
The first thing I did was to take the paneling off of the walls. This revealed vinyl "tile" on the lower wall and drywall on the top. My dad had put the paneling up probably about 40 years ago and obviously he was as curious as I had been about the angled wall because behind the wood was a duct-taped hole.


THE WALLS
The first thing I did was to take the paneling off of the walls. This revealed vinyl "tile" on the lower wall and drywall on the top. My dad had put the paneling up probably about 40 years ago and obviously he was as curious as I had been about the angled wall because behind the wood was a duct-taped hole.


Behind the vinyl on the bottom I found drywall originally painted mint green now covered in the adhesive holding the tile on.


I decided to go further and started removing the old drywall on the long wall. This work was done quite awhile ago and I wish I could say that I remember why I was so determined to do this. Because now later in the project I realize it would have been a better idea to leave it alone. But what is done is done. I left the drywall intact on the other walls.
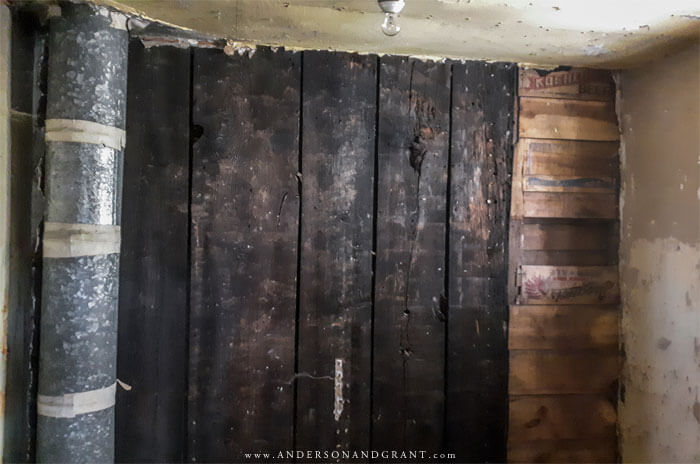
Behind the drywall were very rustic boards. While walls in our modern homes are structurally built with 2x4s and plywood, old homes were often constructed with three layers of staggered vertical boards like this. That is one reason why old homes do not have insulated walls....because there is no where for it to go unless you stud the original walls out with 2x4s. This part of the wall was originally the exterior of the house and would have been covered in the same wood siding that I've exposed in the breakfast nook.
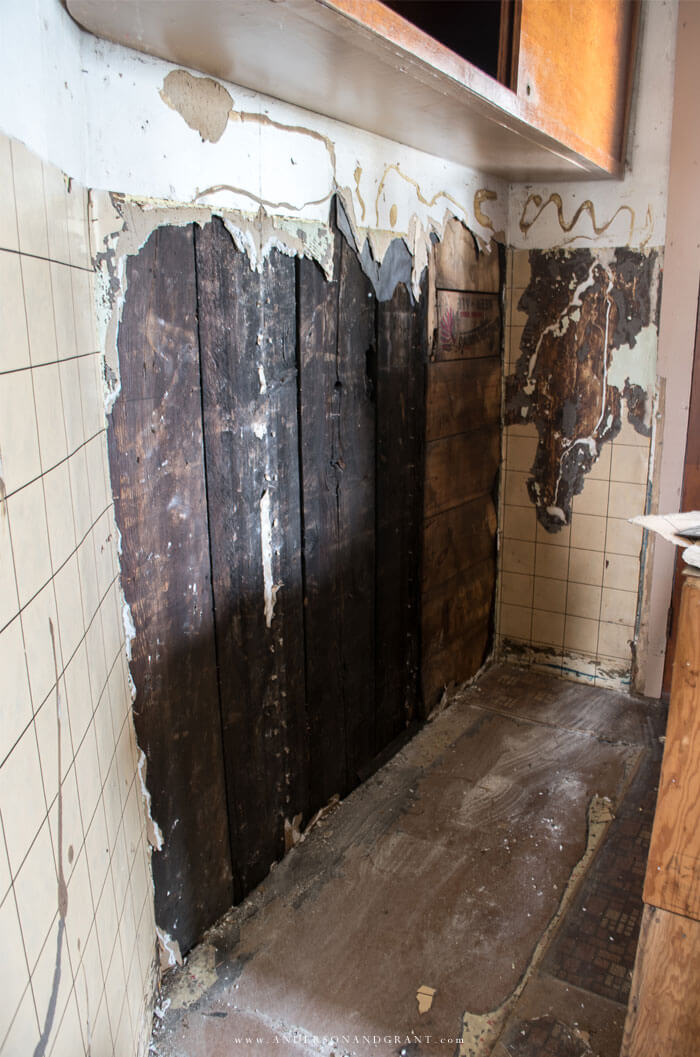
Behind the drywall were very rustic boards. While walls in our modern homes are structurally built with 2x4s and plywood, old homes were often constructed with three layers of staggered vertical boards like this. That is one reason why old homes do not have insulated walls....because there is no where for it to go unless you stud the original walls out with 2x4s. This part of the wall was originally the exterior of the house and would have been covered in the same wood siding that I've exposed in the breakfast nook.

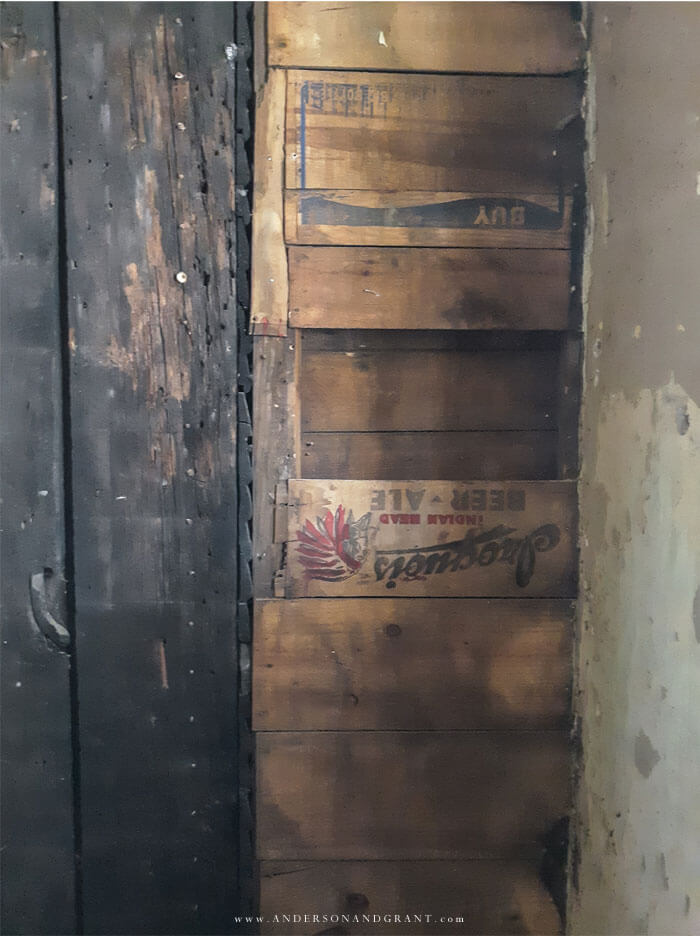
In addition to these structural boards is a section of wall built out of the side of beer crates....one of the first signs that this probably wasn't a professional job. You used what you had I guess. This small area was added on when the room was built and is the reason why the entry door is bumped out from the other half of the house outside.

In addition to the different wall surfaces, you can also see the large duct running from the basement to the upstairs bedroom.



THE CEILING
I don't have a good image of the ceiling, but I removed the ceiling tiles that my dad had installed when he did the paneling. Underneath that was hardboard that had been nailed in over top the drywall and painted. When I removed this, it was obvious that the owners had installed the hardboard because the drywall was pretty damaged. You can't tell from these pictures, but they had added texture to the ceiling with plaster and it was cracked in a lot of places and in others, the drywall was not attached to the joists at all.

THE FLOORS
I removed the worn linoleum tile (again installed by my dad during the previous reno) and subfloor to find another layer of sheet linoleum and subfloor.
Underneath those four layers, I found hardwood flooring. At this stage, it was hard to tell exactly what condition the floor was in because there was a paper tape applied everywhere that the boards would meet and it was held on by an almost cement-like adhesive. Not sure what the purpose of this would have been.


So this is where we are following the demo in this room. Like I said, it's bad, but it will get better.
Next week, I'm going to get away from how horrible things look and show you all the pretty I have planned for this space. I'm going to show you what my original plans were, and then give a glimpse into where the design is headed now thanks to the problems my fixer upper presented.
I've got to know, though.....is a project like this something that you would ever try to tackle on your own? Are you ever able to look at run-down homes or rooms and see what they could be or do you just see the problems?
ONE ROOM CHALLENGE
Week No. 1 - Entryway Before Tour
Week No. 2 - Demo in the Entryway - You are here!
Week No. 3 - Entryway Design Plan
PIN THIS POST
