Progress is moving along in my 1900s fixer upper and it has been exciting to find some original character in the dining room.
MACTAVISH HOUSE | Published February 10, 2019
Work is moving along at my "project" house. It may be moving slowly, but progress has been made. At the same time, my plans for how this was all going to progress so that I could quickly show you a few finished rooms isn't going as planned. But isn't that the way with any fixer upper or home renovation in general?
Today I wanted to catch you up on how the dining room is working out and my altered plans for moving forward.

What has been most interesting is seeing the "trends" of the years uncovered in this house. What was popular in the day was covered up to freshen things with another new layer. And now here I am taking it practically down to where it all started. As one person pointed out in a comment on my before tour of this fixer upper, the house is almost like a time capsule, and I couldn't agree more.
In a reno project like this, you also get to understand how people decorated and how they made do with what they had at the time. Where we now go to Home Depot and pick up the supplies we need and charge it, people at one time tried to work with what was available, found ways to repurposed or create ways to keep the costs down.
So let's being with the positive progress in the dining room......
HARDWOOD FLOOR
Let's start with the best news.
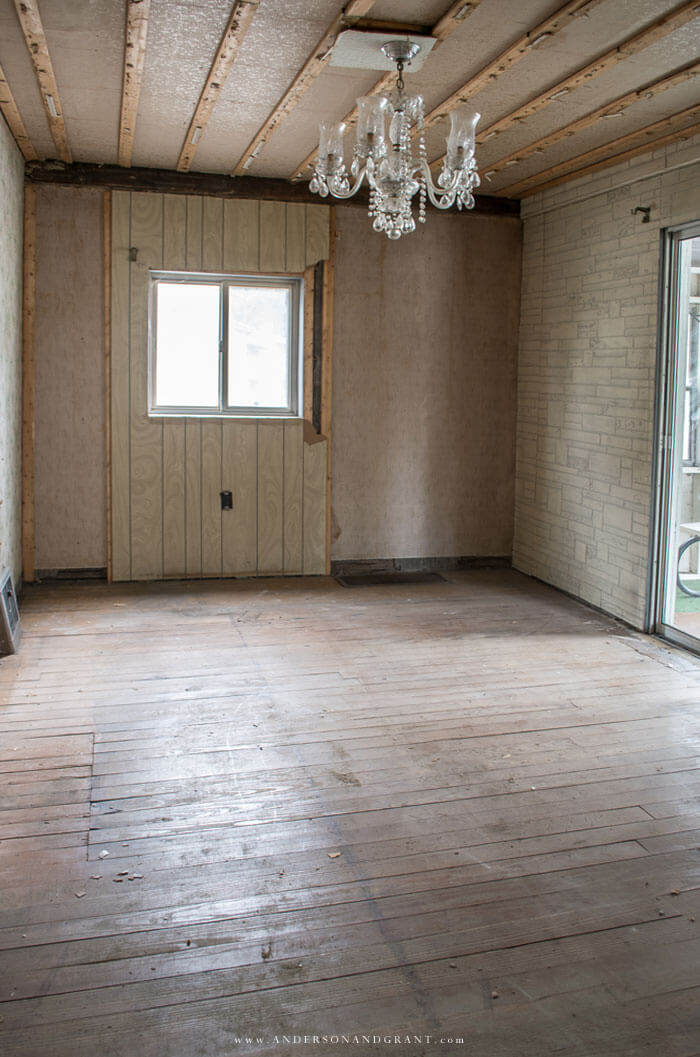
Regardless of what else I discover in this house, the beautiful hardwood floors I found in the dining room (and likely in the living room and kitchen) practically make up for anything original I find that needs to be replaced. (Please forgive the dust!)

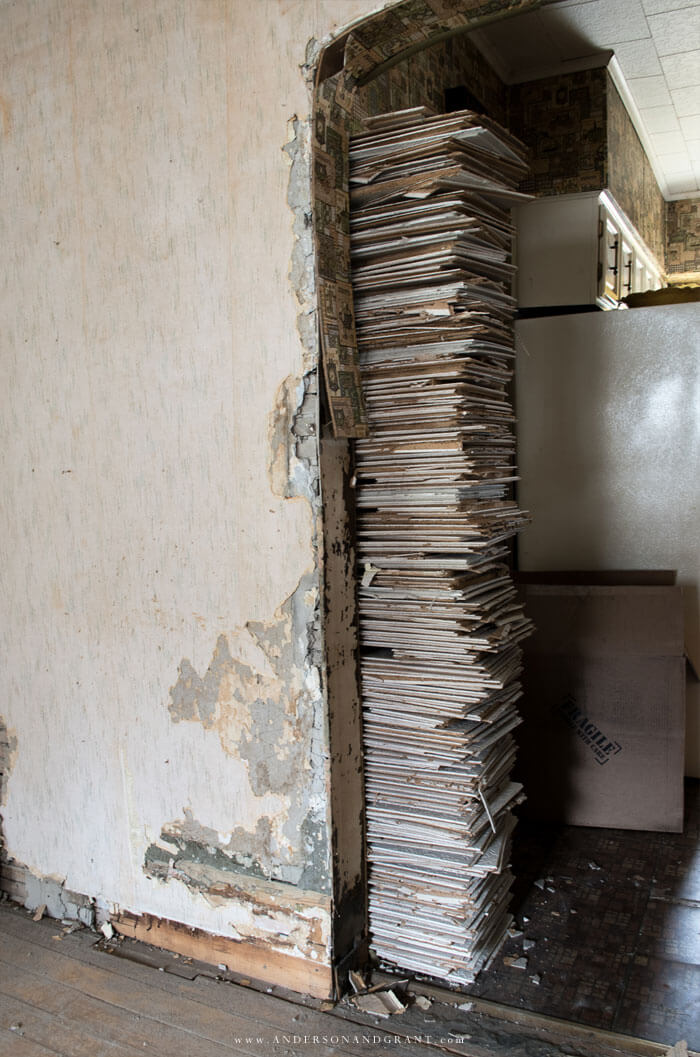
The previous owners of the house stained and then later painted the outer edges of the room that were not covered by a rug. And when my grandparents owned the house, faux parquet floor tiles were laid over the painted area. But what lay underneath the rug is untouched tongue and groove wood planks.
While I anticipated the wood flooring in this room, I had figured on having to sand layers of paint off the floor to get to bare wood. But thankfully the job will be much easier since there is only a small portion that will need done.
With the help of my mom, the faux parquet that was glued down has been removed throughout the room. I was doing it the hard way of trying to chip it all off, but she then came up with the easier route of using a hot iron over the tiles to loosen the old glue.
In the picture below, you can see the difference between the painted floor and the (cleaner) bare wood. And if you look closely at the top of the picture you can also see the darker stained color which is likely more the direction that I'll take in the house.

PLASTER WALLS
As I had said in my original house tour post, my plan for the dining room was to remove the paneling and faux brick on the walls and hopefully expose picture perfect plaster walls. And in some parts of the room, that is what I found.
But in other places the plaster is broken or has been removed completely. Above the window, for instance, the plaster is totally gone and not insulated. I've left the paneling in this area for the time being because it is winter in North Central PA and a few weeks ago the windchill was negative 30. I'll take every bit of protection from the cold I can get right now.
The same is true for why the faux brick is still up.

I still think that these walls are salvageable, though, by blending drywall into the plaster areas. And I know that is not the ideal way to do it, but it will keep costs down for the time being without having to tear everything out and drywall the entire room, which I don't feel I can't do on my own.
Before I can get to repairs, however, I must spend time removing the multiple layers of wallpaper that are covering the walls. I was interested to find that obviously having a "statement" wall was popular years ago because the wallpaper is different on one wall in the room.

WOOD BEAMS
One thing I have always wondered about in this house is why there was a bumped out area around the ceiling on three walls of this room. And I was really happy to find that underneath the lath and plaster were beautiful wood beams. So while it wasn't in my original plans to go with a more rustic touch to the room, these beams have to be exposed and I'll likely add a couple more to make it look intentional.
I don't plan on exposing the area over the patio door, though. I don't want to overwhelm the space with wood beams, and if and when I decide to drywall here, that beam could be built in and disappear entirely (as has happened with the paneling in the living room).
What is most interesting about taking the layers off of these beams was that I found more wallpaper underneath the lath and plaster. And in one of the areas behind the faux brick wall where the lath was removed you can see wallpaper. Obviously at one point, the owners added lath and plaster (and wallpaper) over the walls they already had. It almost makes me want to remove it all just to see what was originally here......almost, but I'm not going to.
Counting the layers I found under the lath and plaster, I'm dealing with at least 5 layers of wallpaper laid one on top of the other.....plus borders around the ceiling in addition to those layers. Stripping wallpaper must not have been something done at the time.
CEILING
The white ceiling tiles have been removed exposing the furring strips attached into the plaster ceiling covered by....some more wallpaper. I still have most of the wood to remove from here before I can tell if what resides under the paper is salvageable. I am really not looking forward to removing all the wallpaper in this room....anyone want to help?!?!?!

And now the not so good news......
WIRING
It looks as though I'm going to have to have a lot of the wiring in the house redone. While the knob and tube wiring was replaced long before my grandparent's bought the house, the wiring I can see doesn't exactly fill me with confidence that it was done correctly. Once again.....it is something to be expected when dealing with an old house.
And while rewiring the house costs money and doesn't excite me to spend a lot on something you'll never see, this is what I consider to be the most important change to make in any house. We all want a home that is safe regardless of what it looks like.
WINDOWS
I had mentioned in my before tour that I'd be doing siding, doors, and windows in the spring. And I thought I could work around the fact that the window would be enlarged in the dining room so that I could still get the room done. But as I pointed out above, removing the paneling in the area revealed, well, the outside wall. I hate to spend the time adding drywall here that is going to have to be cut out in a few months and surrounding the window with trim that will end up being too small. As much as I want to get this room completed, I also don't want to waste time or money.
So, while I'm still going to be focusing on moving forward with the dining room, I'm also going to be jumping around to other areas of the house, too. I had thought that there wouldn't be a lot to change in the living room and dining room and that they could be knocked out quickly before moving into spaces that need more attention. But I now realize that I need to see what I'm working with throughout the entire house and get things done at one time.
Even though there have been a few setbacks, it has been a lot of fun to begin transforming this house into a home. Next week I plan on sharing my design plans for the space that include my meant-to-be-mine antique dining table, even though it will be awhile before it will look like my dream!
SOME MORE POSTS YOU MIGHT ENJOY
THE SECRET TO DECORATING LIKE A PRO.....and saving time and money
