A tangy alternative to a traditional pie crust recipe for all of your favorite pies and pastries.
COOK+BAKE | Updated August 17, 2023

Regardless of what type of pie you're baking, you need a good recipe for pie crust.
Some pies like basic blueberry are best with just an ordinary butter and flour crust. Other fruit pies benefit from a thicker, more rustic crust recipe that might include sour cream and sugar amongst other things.
I recently discovered a recipe for Buttermilk Crust that adds a nice rich, tangy flavor to a pie and best of all, it was really easy to work with. It rolled out perfectly and didn't shrink while it was baking.....two important factors to look for when trying to find your favorite recipe.
This is the pie crust recipe used for my Apple Butter Pie and it pairs nicely with other fruit filled pies as well bringing a rich taste that can't be achieved with an ordinary butter crust. It can also be used for galettes, homemade pop tarts, cinnamon rolls, turnovers and other pastries that could benefit from the added flavor.

This post contains affiliate links which means I receive a small commission if you choose to make a purchase using the link, but there is no additional cost to you. For more information, you can view my disclosure policy.
Why Use Buttermilk in Pie Crust
- Adds a rich, tangy flavor to your pie which enhances many fillings and adds depth that a butter crust doesn't have.
- Creates a texture that is easy to work with when rolling out and shaping the dough, doesn't shrink, and is not dry or crumbly once baked.
- The baked crust tends to have a deeper golden brown color which is desirable for a pie.
- The crust is multi-purpose and can be used for both sweet and savory pies. It adds complexity to quiche, pot pies, and hand pies, but pairs just as well with fruit and pumpkin pies.
What You'll Need
Here are the ingredients that you'll need to have if you'd like to try this pie crust recipe for yourself.
- all-purpose flour
- salt - Salt counteracts any bitterness and adds flavor to your crust.
- granulated sugar - Sugar is included to help with browning and won't add a noticeable sweetness to the crust.
- unsalted butter - The most important ingredient when making pie crust as it is where your flaky texture will be made. Tt should be very cold and cut into small cubes.
- buttermilk - if you don't have any, see the tip below
If you don't have any buttermilk or would prefer not puchasing it just for the small amount used, you can make it yourself!
For this recipe, simply add 1 teaspoon of vinegar or lemon juice to 1/3 of a cup of milk. Stir them together and allow it to sit for 10 minutes. Then it is ready to use for your recipe like the ordinary liquid.
How to Make Buttermilk Pie Crust
Now let me explain the steps to making your own pie crust.
PREPARING THE DOUGH
Food Processor Method: This is the easier and faster method, but your crust will not have as flaky texture as doing it by hand.
Combine the flour, salt, and sugar in the food processor. Add the butter on top and mix until it is evenly distributed. The mixture will turn into chunky crumbles. Continue mixing as you slowly pour in the buttermilk. Mix until everything is completely combined, but do not overmix the dough. It may still be a little crumbly, but will come together later when you roll it out.
Making the Dough By Hand Method: This method will yield an ultra flaky crust because the pieces of butter tend to be larger than with the food processor, but it is harder to do.
Add the flour, salt, and sugar into a large bowl and mix them together. Place the cubed butter into the mix and use a pastry cutter to blend the butter into the flour mixture until what you have looks like chunky crumbles. Your butter should be about the size of peas. Stir in the buttermilk and continue blending until your dough comes together. You may need to use your hands or a wood spoon. When combined, it may still be a little crumbly, but will come together later when you roll it out.
CHILLING THE DOUGH
Divide the dough between two pieces of plastic wrap and form two separate round disks. Mix the dough with your hands until it holds its shape. You want the disk to be as circular as possible since it will be easier to roll out later. Wrap well and then refrigerate for at least 30 minutes before making your pie.
It will last in the fridge for about 5 days if you'd like to prepare it ahead of time.
MAKING THE CRUST
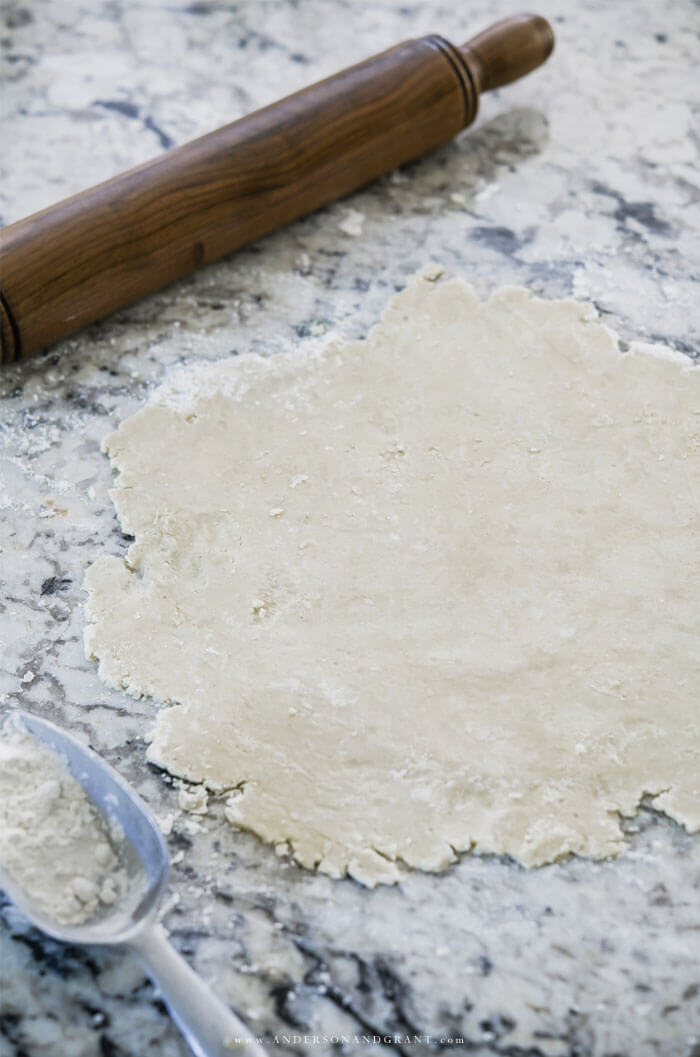
When you are ready, remove one dough round from the refrigerator and roll it out using as little flour as necessary to keep the dough from sticking. Place it into your pie pan without stretching the dough and crimp the edges however you'd like (if you are making a one-crust pie). Place the completed crust back into the refrigerator for 30 minutes before adding your filling. If you are making a double crust pie, you can add the filling and second crust now and then place it back into the refrigerator for 30 minutes before baking.
For whatever type of pie you're making, it is best to put the crust back into the refrigerator for at least 30 minutes before it goes into the oven to prevent it from shrinking. The dough needs to be solid before being baked.

Tips for Successfully Making Buttermilk Pie Crust
- Make it cold. The butter and buttermilk should be used directly out of the refrigerator. You'll want to cube your butter first and then stick it back into the refrigerator for a few more minutes for best results. It even helps to put the measured flour into the refrigerator while you cube the butter.
- This pie crust dough can be made quite easily in a food processor. But if you don't have one, you can still make it using a pastry blender. (that's how I made this dough.)
- Roll it cold. If your room is hot or humid, the dough is going to be sticky and adding too much flour will make it tough.
- The dough may seem a little crumbly, but don't add extra buttermilk. It will come together when formed into a round disc and refrigerated.
- Refrigeration is key to making a crust that doesn't shrink. Before putting any pie made with this crust into the oven, it needs to rest in the fridge for at least 30 minutes to make it solid.
- If you're looking for a really golden crust when it comes out of the oven, mix one egg with a splash of milk and brush it onto the crust edge before baking.
- If your crust is getting too brown, cover the edges with strips of aluminum foil or a silicone crust shield (a must have tool if you bake many pies!).

BUTTERMILK PIE CRUST
A tangy alternative to a traditional pie crust recipe for all your favorite pies and pastries.
Makes two 9-inch pie crusts
INGREDIENTS
- 2 cups all-purpose flour
- 1/2 teaspoon of salt
- 1 Tablespoon granulated sugar
- 12 Tablespoons unsalted butter, cold and cut into cubes
- 1/3 cup buttermilk
INSTRUCTIONS
STEP 1 (WITH A FOOD PROCESSOR): Combine the flour, salt, and sugar in a food processor. Add the butter on top and mix until it is evenly distributed. The mixture will turn into chunky crumbles. Continue mixing as you slowly pour in the buttermilk. Mix until everything is completely combined, but do not over mix the dough. It may still be a little crumbly but will come together later when you roll it out.
STEP 1 (BY HAND): Add the flour, salt, and sugar into a bowl and mix them together. Place the cubed butter into the mix and use a pastry cutter to blend the butter into the flour mixture until what you have looks like chunky crumbles. Stir in the buttermilk and continue blending until your dough comes together. You may need to use your hands. It may still be a little crumbly, but will come together later when you roll it out.
STEP 2: Divide the dough into two round disks wrapped in plastic wrap. Refrigerate the dough for about 30 minutes before making your pie.
STEP 3: Remove the dough from the refrigerator and roll it out using a little flour if necessary so that the dough does not stick. Place it into your pie pan and crimp the edges however you'd like if you're making a one-crust pie. Place the completed pie crust back into the refrigerator for 30 minutes before adding your filling. If you are making a double crust pie, you can add the filling and second crust now and then place it back into the refrigerator for 30 minutes before baking.
Frequently Asked Questions
Have some questions about making this pie crust? Here are some that are frequently asked to help guide you through the process.
WHY DOES THE RECIPE USE MORE BUTTERMILK THAN WATER
A typical pie crust recipe uses about 1/4 of a cup of water to form the crust. Buttermilk is a lot thicker than water, so you need more of it to properly hydrate the dough.
DOES THE DOUGH FREEZE WELL
The addition of the buttermilk helps the dough to freeze really well, so you can prepare some rounds in advance. Or if you are making just a single crust pie like the Apple Butter or Pumpkin pie, you can freeze the extra crust for later. Wrap the rounds tightly in plastic wrap and place inside of a zip-top bag or airtight container and freeze for up to two months. When you are ready to use it, defrost the crust overnight in the refrigerator.
WHY IS MY DOUGH CRUMBLY AND FALLING APART
This is a sign that your pie crust dough is too dry. Work in just a few more drops of buttermilk to bring all the ingredients together. If you find that it gets too soft, chill the dough before trying to roll again.
WHY IS MY DOUGH STICKY
Your dough is either too wet or too warm...or a combination of both. Use a light dusting of flour underneath the dough, sprinkle a little more on top and on your rolling pin. Too much flour will make your dough tough, so do this cautiously. If it is still sticking, try rolling on top of a piece of wax paper or chill the dough again.
Most of the time, a pie crust just forms a base for your filling, but with this Buttermilk Pie Crust recipe, the crust becomes its own delicious component. Enjoy!
More Baking Posts You Might Enjoy Making
Chocolate Covered Cherry Devil's Food Cake
APPLE BUTTER PIE - Just like your favorite pumpkin custard pie, but with an intense apple flavor
PUMPKIN SPICE CRANBERRY MUFFINS - Great for a fall or Christmas breakfast
VANILLA PUDDING CHOCOLATE CHIP COOKIES
RUSTIC APPLE CRANBERRY PIE - A delicious pie filled with tart cranberries and Granny Smith apples layered over a sweet pastry cream filling.


