
Learn a simple painting technique to try on old or second hand containers that will give the texture and charm of a pricey piece of found pottery for almost no cost at all.
CREATE | Updated January 28, 2025

Do you ever look at your decor and wish you had something different to decorate with?
Or does browsing through your favorite stores or blogs leave you wanting something similar for your own home?
We've all been there, but buying new can be a drain to your budget, and then you're presented with the dilemma of what to do with the things you've already bought.
You spend hard-earned money purchasing home accessories that at one point you did like, so it is hard to part with those items even if they aren't totally "you" anymore.

There are a variety of ways to transform and update those unwanted decor pieces you already have or can find for close to nothing at a thrift store.
A little sanding, coat of paint, or adding/removing a detail can go a long way in transforming something old into stylish decor that can be loved again.
It is always fun (and economical) to look at your own decorations and furniture with an eye towards what a simple makeover can do!
READ NEXT: Over 30 More Transformations of Secondhand Thrift Store Items

"Found pottery" is one of those must-have decor trends that you may desire and can actually DIY easily and affordably!
All over, there are beautiful reproduction stoneware clay urns and vases in shades of gray, black, and cream with lots of weathering and wear. Pottery Barn, McGee and Co, Restoration Hardware, and other retailers are stocking them. They are incredibly pricey, though, and don't fit into everyone's decor budget.
The good news is that you can take a newer vase or terra cotta planter and make it look old. And it looks just as good as the ones that retailers are selling for hundreds of dollars! Just because it is faux, doesn't mean it has to look fake.
Some tutorials you may have seen for DIY aged pottery involve spray painting vessels and then rubbing them with mud and dirt for an aged look.
But this tutorial will show you there is another (cleaner) way, and it only involves paint and a special technique that will leave a lasting aged finish just as realistic as the expensive retail versions.
This makeover was given to a couple handmade Mexican planters with a very southwestern dessert vibe. They were bright orange, similar to the pot pictured here and had black primitively painted markings.
(The original before picture got deleted on my camera before this post was completed.)
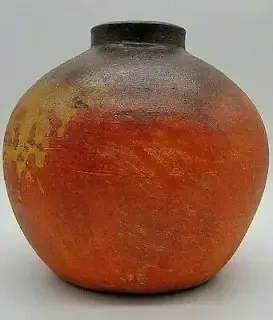
The planters had a lot of nice handmade texture to help keep the finished pots from simply looking like they were painted.
And one of the two vases even had a crack running down the side, which really adds to the old, worn vibe you'd expect from a piece of found pottery.

Believe it or not, but this is a project you can't mess up, regardless of your skill level or how comfortable you are with a paint brush. If you don't like what you've painted or the colors haven't blended correctly, just add a little more paint or water and try again. Keep going until you get the look that you want.
Be sure you read through all the instructions before beginning so you are clear on what to do, and you may want to practice the technique on a scrap board ahead of time.
Once you get the hang of it, the process goes quickly and you'll end up with finished clay pots that look very similar to the real thing. You just need to have a little patience.

How to Get an Aged Stone Finish on Practically Any Vessel
The key to achieving the look of the mottled paint finish is through the technique of dry brushing. Basically, you'll put a little paint on your brush, then brush most of it off onto a piece of paper towel before touching the brush to your surface.
This leaves a nice feathery appearance and visually adds texture to whatever you are painting.
It is a process you'll want to spend a little time getting just right and isn't something that you'll do in just a few minutes. It will take a bit of time to layer on the multiple colors of paint creating a finish that looks natural, but it can be fun to watch the aged appearance you're looking for take shape.
When you're done, some of the light gray areas will still peek through, and you'll see spaces that are more charcoal or more tan than others. But everything should gradually blend together.
Start with a Good Textured Finish
You want to look for a planter or vase that already has a nice texture to the outside. This texture will help keep your container from simply looking like you painted it.
Anything perfectly smooth will require an additional step of applying plaster to the outside or adding baking soda to your paint to achieve the realistic look and feel of aged pottery.
Your basecoat of paint can add additional texture to your vase. Before you start dry-brushing, you'll want to paint your vessel in a light gray color. While you can use a brush or sponge brush to do this, pouncing the paint on gives a lot more texture and helps the paint to adhere very well to the surface.
Use foam pouncers and press the paint on to what you're painting. It puts the paint on in a thicker coat and the foam sponge creates texture. The pouncers are helpful for a lot of projects, especially when painting something with a smooth surface like glass.

Be Ready for Multiple Steps All at Once
The tutorial for this project can sound a little scary because there is a lot happening at one time. But you can't mess it up and you'll quickly get the hang of what you need to do.
Just be sure when you are ready to begin, you have your tan and charcoal colored paints ready as well as a bowl of water and piece of paper towel because you'll be using them all at relatively the same time.
Once you start dry brushing the paint on, you'll need to be able to move around the entire vessel in one sitting so that the finish is cohesive. The water is helpful for smoothing out the painted finish and the paper towel can be used to gently blot the wet areas to blend the colors together.
Supplies You'll Need
- Pot or vase that has a bit of rough, "handmade" texture to the outside: I love looking at the clearance merchandise in Goodwill for vessels no one will buy!
- Light gray, taupe or greige, and charcoal/black colored paints: I used Fusion Mineral Paint in Stirling, Algonquin, and Ash, but any acrylic craft paint will do.
- Foam Pouncers or a High Density Sponge Brush
- 1-inch craft paint brush
- Small bowl of water
- Paper towel: For drybrushing and blending.
How to DIY a Realistic Aged Stone Vase with Just Paint
STEP 1: Clean your vessel well with soap and water. Allow it to dry thoroughly before starting your project.
STEP 2: Paint the entire pot or vase with light gray paint using a foam pouncer.
Gently press the paint onto the pot rather than brushing it. This gives added texture and helps the paint adhere when painting over ceramic or glass.
Doing it this way, I needed two coats of the gray paint, but you may need more if you brush the paint on. Allow each coat to dry thoroughly before adding another or the paint may peel.

STEP 3: For this step, you'll want to use a 1 inch craft paint brush that you don't mind throwing away when you're done. It's going to get a lot of wear.
Have ready your other two colors of paint, a small bowl of water, and piece of paper towel. You'll be using all four at the same time.
Add a little tan paint to your brush, and wipe most of it away brushing onto the paper towel. Then touch the brush to the surface of the vase and rub it back and forth. The paint with transfer onto the vase in some areas but not others and that is what you want.
You're not trying to paint the surface, but rather give the illusion of visual texture.
STEP 4: Once you've added the tan color in a small section, use the same technique with the charcoal paint, sometimes painting into where you added the tan and sometimes in the gray areas.
You are trying to blend the three different paint colors together to create a mottled finish. Really rub it in going back and forth with the brush.

STEP 5: If you find that the paint is starting to pull off of the vase, allow that spot time to dry. If the paint is a little tacky, it may start to peel as you rub the finish with your brush. But that can be touched up later.
STEP 6: If you find that the colors are not blending, touch your brush into the water, blot it dry on the paper towel, and then brush it onto the painted vase to smooth everything out. Don't add too much water, or you'll start to get more of a watercolor effect, but the water works nicely to achieve the finish.
Blot the areas on the vase with a paper towel to blend the colors.

STEP 7: Work your way around the entire outside of the vessel using this technique of dry brushing and blending with water and a paper towel.
STEP 8: Use the same technique inside the vase if you plan on leaving it empty or paint the inside with one single color if it will not be seen.
STEP 9: The Fusion Mineral Paint that I used has a built in top coat, so I didn't do anything more to the outside of the vase. But if you use craft paint, you may want to add a polyurethane sealer or paste wax finish to the outside to protect your paint job.

If you have any questions or get stuck with how to follow this tutorial, please feel free to shoot me a message. I really love how these planters turned out and would love to help you recreate them for yourself if you're interested!
Whether you use something cheap found at the thrift store or makeover a vessel you have unused at home, I think you'll find that this DIY is a fun way to get the look of old pottery for less.
Other Posts You Might Love
How I Built a $2650 Restoration Hardware Table for Free
Four Techniques to Give Character to Thrift Store Finds
DIY Tobacco Basket - Basket-making anyone can handle!
Lamp Makeover - Using joint compound from the hardware store to create a textured finish.
Creating Kitchen Wall Art with Cutting Boards - Using wood letters from the craft store to spell out words.
LOVE THIS PROJECT?
Be sure to join the anderson + grant mailing list to get all the tips, projects, and recipes for making your house feel more like home delivered right to your inbox.
Please click on the image below to share it to Pinterest. Not only can you easily refer back to it, you'll help me spread the word so that others will benefit from the post as well!

