
What do you do with a picnic basket that has only one handle? That has been a question I've been trying to answer for more than five years.....and no, I'm not exaggerating! If you have been reading this blog for long, I'm sure that you've caught on that most of the time it takes me months (and obviously sometimes years) to figure out what to do with things that I've purchased for DIY projects. Today's transformation is no different.

I purchased a picnic basket at Goodwill that had one handle broken off, but it was still with the basket. I bought it to reattach the handle and on the the lid, I would do some decorative painting (probably a snowman) for my Christmas open house. And so the basket sat waiting to be painted and became a place to hold other smaller items I had purchased. I never knew what to paint on the lid because of the cross pieces of wood on the top. And I could never figure out how to reattach the broken handle.

And then finally, years later, inspiration hit and I realized that a picnic basket with a lid and handles didn't need to stay a picnic basket with a lid and handles. When I shared my refurbished child's chair with you a few weeks ago, I commented about loving how things from the past sometimes came to serve different purposes. I decided to remove the lid and the other handle and turn the picnic basket into a large, decorative basket. I wanted a basket that looked like it had been around and used for a long time, with paint worn away.

To begin the project, I got out one of my most used tools.....a clear candle. (I really need to do a whole post on this process!). I rubbed the candle anywhere that I wanted the paint to chip away later.
I actually did a little research and browsed through pictures of old baskets on Google and Pinterest to get an idea of where the paint would actually chip away on a vintage basket. Around the top was a must for a LOT of wax, as well as the centers of the woven wood....but paint would not naturally chip away very easily where the weaves of wood meet. The corners of the basket would receive more wear than the center. It was a slow process making sure everywhere I wanted to chip was covered with the wax, but it was worth it in the end.

The outside of the basket was painted with one haphazard coat of a slate blue gray color from the oops paint at Lowes. (I actually went in looking for a shade like this and was happy to see it in the oops pile so that I didn't have to stand there overanalyzing which slate blue gray was the right shade.....Don't you love it when "someone" can help you make a decision!?!?!) There were some areas on the basket that didn't get painted at all. But I made sure that the areas where the weaving met got painted well, since I didn't want that to look like the paint had worn.
The paint hadn't dried long before I started sanding. I sanded heavily in the areas where the natural distressing would occur, and lightly in the areas I didn't want to distress...just enough to make a natural, even finish.

Finally, the basket was coated with Miss Mustard Seed's antiquing wax and I achieved my version of perfect for this basket. The wax filled into the wood grain and places where the weaving met. The basket looked good before the wax, but the antiquing took it over the top to making it look old.


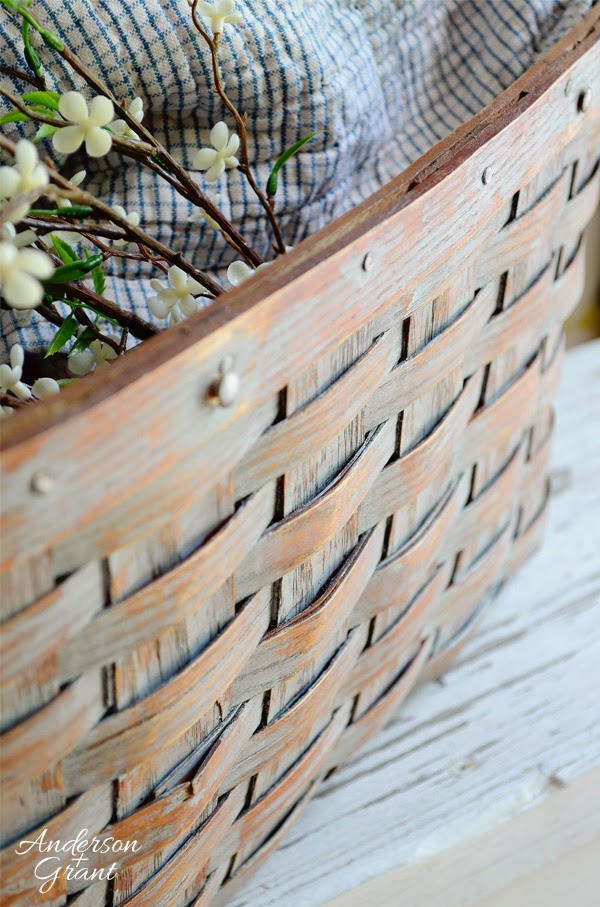
This basket is so perfect for filling with a quilt, some flowers, magazines......You name it! I love that it has the look and feel of something that has been around a long time. And would you ever guess that this large basket used to be a picnic basket?
