This post introduces four simple techniques that will give character to just about anything you might find at a second hand store or yard sale.
CREATE | Published July 1, 2019

This post may contain affiliate links which means I receive a small commission if you choose to make a purchase using the link, but there is no additional cost to you. For more information, you can view my disclosure policy.
There is so much to be found at thrift stores and yard sales to decorate your home. Shopping in places like this allows you to save money and likely end up with something really unique.
The problem is that most times, it takes an open mind and willingness to do a little rehab. Maybe something is chipped or in need of a fresh coat of paint. Or perhaps the item could be turned into something else with a little vision.

Awhile ago, I was shopping for some chunky wood candlesticks but wasn't willing to pay the exorbitant price that many retailers were asking.
At Kirklands, however, I stumbled upon a shelf full of them in two different sizes. They were in the clearance section thanks probably in part to the fact that they were an orange-y wood tone that turned most people away. But some paint and a few different techniques could transform these into something special.
SOME MORE DIY POSTS YOU MIGHT LIKE


As I look back at this project now, I realized that everything I did to give these wood candle holders a little charm can be applied individually (or collectively) to just about anything that you'd like to update. Nothing is too hard or time consuming, but each can bring some life back to cast off items you may find.
Side note: For this project, I chose to use Fusion Mineral Paint because it gives a beautiful finish and requires no prep work or finishing sealer. The less work the better in my opinion. Chalk paint and milk paint are also great for projects like this.
4 TECHNIQUES THAT WILL ADD CHARM TO SECONDHAND FINDS
LAYERS OF PAINT WITH DISTRESSING
If you enjoy a good DIY or rehabing a secondhand find, it is likely you know all about painting and distressing. But what happens when the item's finish isn't what you'd like to see peeking out in the distressed areas? Or what if you want to add even more age and character by making the piece look like it's been painted more than once through the years?
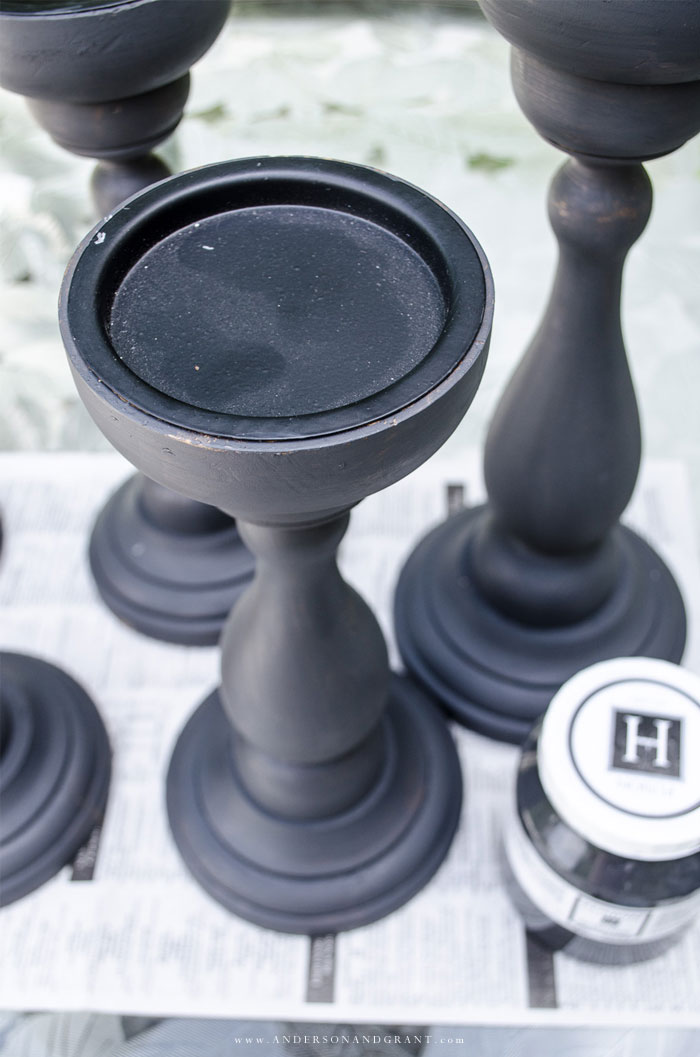
There is a pretty easy solution. Before painting your find in your color of choice, first paint it in the base color that you'd like to see through the distressed areas. In the case of these candlesticks, I chose a dark charcoal because it would look good behind the variety of shades I was painting the set, but you can choose any color you'd like. And if what you are painting is natural, bare wood, you could even stain the wood instead of painting it.

After the paint has dried, you'll want to heavily rub the areas where you'll be distressing with a piece of clear candle. I like to have a few dollar store taper candles on hand for just this purpose. The wax will resist the paint that is put on top of it, helping to easily sand away the top finish later on.
(I actually added the wax in a few areas prior to painting the base, too, so that it would chip away down to the wood finish as well.)
Once the wax is on, paint your item as you normally would. And then when the paint is dry (or almost dry) gently rub the piece with a medium grit sandpaper to add the distressing. You can see in the picture below how the distressed corners reveal the layers of paint and stain underneath.

DRY BRUSHING
Dry brushing is another way to add a different color and bit of texture to what you are painting. This technique can be used on just about anything. (A few years ago, I even dry brushed green pumpkins for fall that turned out so pretty!)

To use this technique, you'll want to put some paint on a paintbrush and then wipe most of it off onto a piece of paper towel. Then gently brush what is left onto the piece you are updating. You don't want to press hard and the goal is not to cover an area in paint here....just to add a touch of a different color and implied texture.
You'll want to use a craft brush that can be thrown away for this technique, because it doesn't stand up well to the rubbing and brushing that you'll be doing.
ANTIQUING
Nothing adds age and patina to a secondhand find like aging it with antiquing. I learned that really well when painting a "carved" plastic bowl I picked up at Goodwill. The antiquing is really what made the bowl spectacular.
You can see a before and after comparison below. Both finishes are equally nice depending on your style, but the antiquing adds an extra level of wear and character.

For the most natural look, I like to use antiquing wax. It is a paste that comes in a container or can. I like to load a large wax brush with some of the antiquing and then rub it over the piece I'm aging concentrating more on areas where patina would actually settle like details in the wood or along the edges of a piece. Then I use a clean rag to remove the excess wax where necessary.
If you don't have a wax brush, you can also use a rag to apply the wax, but if you're going to do a lot of projects the brush is nice to have because it works so well into the details of a piece.
In addition to an aging paste, Fusion Mineral Paint also comes in a variety of other finishes including copper and a liming wax that would add a lot of character to a thrift store find.
SHADES OF COLOR
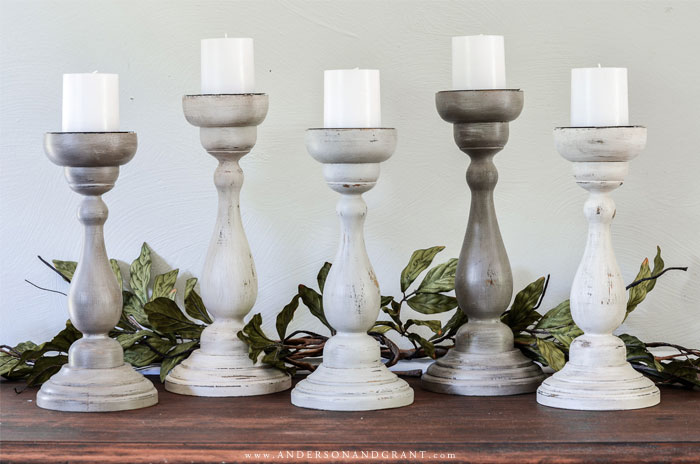
I easily could have painted all the candlesticks I purchased the same color and followed all the techniques I described above. But I also wanted to create a "collection" that looked like they were ones that could have been picked up at different times and places.
To do that, I chose three different neutral shades of paint (Casement, Lamp White, and Algonquin). I love the variety seeing them displayed together.....but because there were so many, you can also have a pair or three of all the same color as well.

You can also use the idea of painting in different colors by painting details a different color or choosing leave part of a piece stained and painting the rest. I do that often with side tables that I want to update where I'll leave the table top stained and paint the base.

I hope this post has inspired you with a few ideas of what you could do to transform something that you see at Goodwill or that you might even have sitting in your own home! We all deserve to have beautiful decor gracing our homes and sometimes the best way to get that is to create it ourselves.
In the comment section below, let me know if you think you'll try any of these techniques or if you've used them in the past.


